Key Points
- •
Optimize gain settings to correctly identify anechoic structures, such as blood, and differentiate hypoechoic, isoechoic, and hyperechoic structures.
- •
Adjust depth to center the structure of interest on the screen that corresponds with the focal zone on most ultrasound machines.
- •
M-mode, or motion mode, imaging displays movement of structures over time and is used to assess cardiac valve movements, inferior vena cava collapsibility, and lung and pleural sliding.
Preparation
Adequate preparation is necessary to acquire the highest quality images possible while minimizing risks and discomfort to patients.
- ▪
Clean the ultrasound machine’s transducer and keyboard with an approved antiseptic wipe according to hospital policy. Some antiseptic wipes may contain alcohol or other cleaners that can damage the ultrasound machine’s screen, keyboard, or transducer. Consult the manufacturer or operating manual for approved antiseptic wipes.
- ▪
For patients in contact isolation, disposable clear plastic covers to cover the entire ultrasound machine may be used.
- ▪
For general ultrasound scanning, stand on the patient’s right side and position the machine directly in front of you. For cardiac ultrasound scanning, some providers may choose to stand on the patient’s left side.
- ▪
Select the most appropriate transducer for the exam to be performed (see Chapter 3, Transducers ), connect the transducer to the ultrasound machine, connect the ultrasound machine to a wall electrical outlet, and turn on the power.
- ▪
Enter the patient’s name, medical record number, and provider. Select the exam type.
- ▪
Dim room lights and position the patient. Most commonly, patients are positioned supine, but position varies with exam type. Many cardiac views from apical or parasternal windows are best acquired with the patient in a left lateral decubitus position. Scanning the posterior chest, including the lungs, pleura, and spine, is best performed in a seated position. Optimize patient comfort to avoid movement while scanning.
- ▪
While keeping the patient appropriately covered to respect privacy, expose the body area to be scanned. Ensure room curtains and doors are closed, and consider having a chaperone.
- ▪
Use sterile transducer covers for ultrasound-guided sterile procedures. Gel, the coupling medium, is applied to the transducer, and the transducer is covered with the sterile sheath. Sterile gel is included in sterile transducer cover kits. The sterile, sheathed transducer can be placed on the sterile field for the procedure.
- ▪
Ensure that an adequate supply of gel is available before beginning a diagnostic study or ultrasound-guided procedure. Devices to warm gel for patient comfort are commercially available.
Image Acquisition
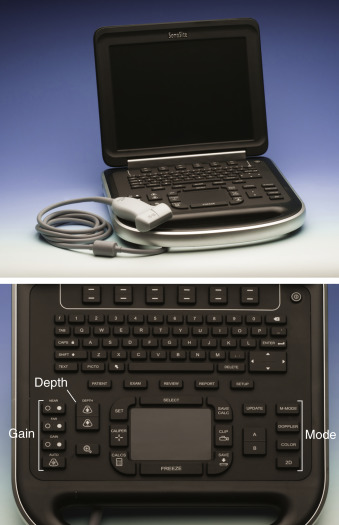
Diagnostic accuracy depends on interpretation of quality ultrasound images. Poor image quality or imprecise ultrasound machine settings can lead to missed diagnoses or misdiagnosis. Understanding key principles of image optimization is essential to obtain the highest quality images. Figure 5.1 displays a keyboard and highlights the primary controls of an ultrasound machine.
Imaging Modes
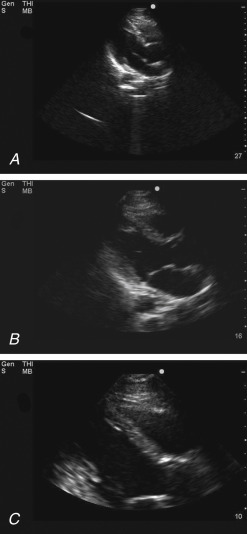
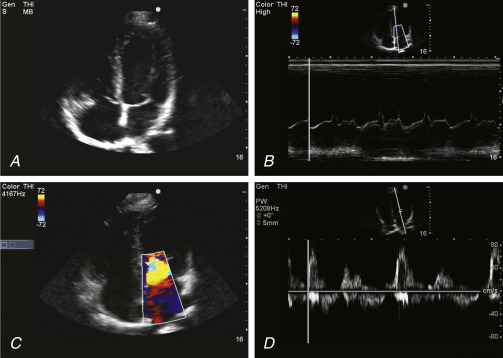
Imaging modes of modern ultrasound machines include 2-dimensional (2-D) or brightness mode (B-mode), motion mode (M-mode), and Doppler mode (spectral, color flow, and power). The vast majority of point-of-care ultrasound applications are performed in 2-D mode ( Figure 5.2 ).
Two-Dimensional Mode
Exam Presets
Most ultrasound machines have presets that adjust the machine to optimize numerous settings, including gain, power, and frame rate, for commonly performed exams. In general, providers should select the most appropriate exam preset and then make fine adjustments to optimize the image.
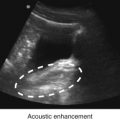
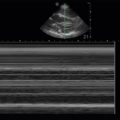
Depth
Depth should be adjusted to position the structure of interest in the center of the screen. Most portable ultrasound machines are fixed with the center of the screen corresponding with the ultrasound beam’s focal zone where the highest lateral resolution is obtained. Depth of the focal zone can be adjusted on some portable ultrasound machines, but in general, the default focal zone depth is the center of the screen. Start scanning with a greater depth setting to visualize surrounding structures, especially if an ultrasound-guided needle insertion is planned, and afterward, reduce depth to center on the area of interest. If the field of view is too shallow, findings in deeper tissues may be missed, whereas a field of view that is too deep leads to poor resolution of important structures in the near field ( Figure 5.3 ).