Key Points
- •
Thoracic ultrasound largely relies on artifacts produced at the readily visualizable pleural line. These artifacts are few and discrete and strongly correlate with pathologic processes.
- •
Low-frequency, phased-array transducers are recommended for complete thoracic ultrasound exams. High-frequency, linear transducers should be limited to anterior thoracic exams for the presence of lung sliding and interstitial syndrome.
- •
Providers must orient the transducer correctly within rib interspaces. Ensure the ultrasound beam is perpendicular to the pleural surface to create artifacts that distinguish normal from abnormal. At least four interspaces in each hemithorax should be examined to ensure diagnostic accuracy of underlying pathologic processes.
Background
Although often termed lung sonography, images obtained by ultrasound over the thoracic cage arise largely from the pleural line, making pleural sonography a more apt term. The reason why pleural line sonography is clinically helpful is based on two insights: (1) in cases of respiratory dysfunction, over 90% of attributable pathology involves the pleura at some point, revealing identifiable pathologic patterns to the provider, and (2) pleural line patterns or “artifacts” correlate with discrete causes of respiratory dysfunction.
Unlike chest radiography whereby an entire view of both hemithoraces is obtained in one image, thoracic ultrasound relies on examining the pleural surfaces at multiple sites over each hemithorax, thus creating an image map of the lungs. The lung ultrasound exam points are specific intercostal positions similar to the traditional physical exam points but have a much higher sensitivity and specificity than physical exam or chest radiography. By systematically interrogating the standard lung ultrasound exam points, providers generate a map of pleural line artifacts that highly correlate with underlying pathology. Skilled providers have published multiple reports describing the diagnostic utility of lung ultrasound. This chapter reviews the techniques to acquire optimal lung ultrasound images while avoiding some common errors.
Normal Anatomy
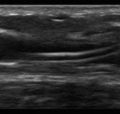
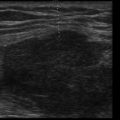
The external thorax consists of skin overlying a layer of soft tissue and muscles covering the rib cage ( Figure 8.1 A ). On the inner surface of the ribs lies the parietal pleura, against which the outer surface of lung, the visceral pleura, slides with respiration, aided by a thin layer of pleural fluid. The visceral and parietal pleura together are 5 μm thick but highly visible on ultrasound. Deep to the visceral pleura are millions of air-filled alveoli within lobules that are subtended by the interlobular septa. These septa insert into the visceral pleura but cannot be seen using ultrasound under normal conditions, since ultrasound is completely scattered by air within the alveoli. The power of lung ultrasound to discriminate normal from abnormal lung tissue stems from this fact: as the septa widen from either hydrostatic or inflammatory fluid infiltration, these septa then fall within the resolution of ultrasound, allowing propagation of the ultrasound waves, forming the artifact called B-lines (see Chapter 9, Figure 9.5 ).
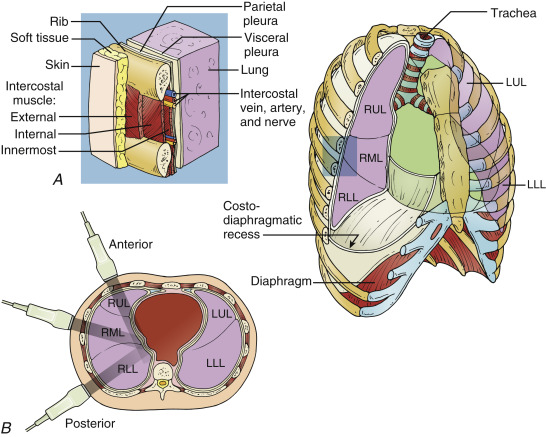
During a lung ultrasound exam in a supine or semi-recumbent patient, the anterior, lateral, and posterior thorax are interrogated along the mid-clavicular and anterior, middle, and posterior axillary lines, respectively ( Figure 8.1 B). The anterior and anterior axillary lung exam points correspond with the upper lobe and right middle lobe, while the mid-axillary and posterior exam points correspond with the lower lobe. Systematic examination over the designated lung exam points elucidates the majority of common lung and pleural pathologies, although medial and focal lesions can be missed. In patients who are able to sit in an erect position, interspaces along the posterior mid-clavicular line can be added to the exam protocol to allow for a more complete examination of the thorax.
Image Acquisition
Transducer Selection
The most commonly used and least limited transducer for lung ultrasound imaging is a 3.5–5.0 MHz convex phased-array transducer common to many multipurpose point-of-care ultrasound machines. The lower frequency allows for visualization of deep structures, especially in obese patients. Although linear transducers used for vascular access may be employed, such transducers are limited by a lack of adequate penetration to visualize deeper structures, a barrier encountered at the lung bases, where the majority of consolidation, atelectasis, and pleural effusions lie. Linear transducers are best used solely for anterior chest pleural line analysis to rule out pneumothorax after vascular access procedures or for characterization of pathology abutting the chest wall.
Patient Positioning
Thoracic ultrasound may be performed with the patient in a supine, semi-recumbent, or erect position. Given the gravity dependence of fluid in the thorax, the appearance of pleural effusions depends on patient positioning, whereas other pleural line patterns are much less dependent on patient position with the exception of interstitial syndrome (i.e., normal patients can have gravity-dependent fluid that widens the interlobular septa at the lung bases), an effect that may be accentuated in the bases of an erect patient but lessened in a supine patient.
Transducer Handling
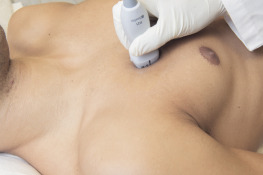
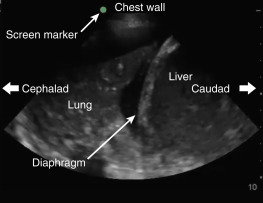
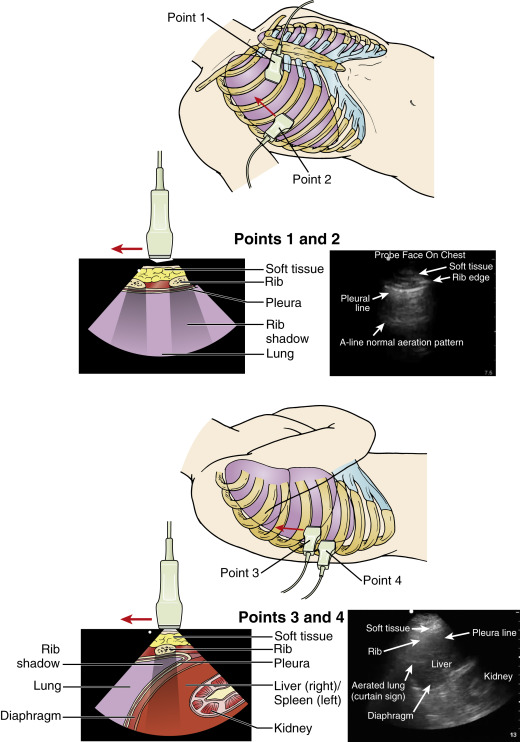
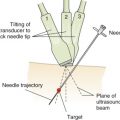
The transducer should be held like a pen, perpendicular to the chest wall with the transducer orientation marker pointing cephalad ( Figure 8.2 ). The screen marker should be set to the left upper side of the screen. Thus, when interpreting thoracic ultrasound images, the screen to the left will be superior, while the screen to the right will be inferior. When the diaphragm is visualized, the screen to the left of the diaphragm (cephalad) will display the thoracic cavity, while the screen to the right (caudad) will display the subdiaphragmatic organs ( Figure 8.3 ). If the machine was previously used in “cardiac” orientation, the screen marker will be on the right side of the screen with potential for major error in orientation.
Technique
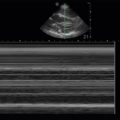
In normal, healthy patients, the combination of “lung sliding” with “A-lines” signifies normal aeration and should be seen over the entire thorax (see “ Image Interpretation ” below). To examine every interspace over the anterior, lateral, and posterior thorax would be impractical for practicing clinicians. Focused lung exam protocols interrogating a limited number of interspaces over each hemithorax have demonstrated high diagnostic accuracy.
The two most common approaches are the six-point hemithorax exam in which the superior and inferior points over the anterior, lateral, and posterior zones are imaged, or the four-point hemithorax exam utilizing the basic lung ultrasound in emergency (BLUE) protocol ( Figure 8.4 ). Use of the BLUE protocol, which examines a total of eight interspaces over the entire thorax, led to over 90% accuracy in diagnosing causes of respiratory failure by expert clinicians blinded to all clinical and radiographic data of patients, an impressive example of the diagnostic power of lung sonography.
Related posts:


Stay updated, free articles. Join our Telegram channel

Full access? Get Clinical Tree


