Forearm Fractures
Diaphyseal radius and ulna fractures are common injuries, so the orthopaedic surgeon must have a firm understanding of their evaluation and management strategies.1 Falls are the most common mechanism of injury, accounting for approximately 50% of injuries, and 42% occur in children under 15 years of age.1 There are four common patterns of forearm fractures: concomitant diaphyseal fractures of the radius and ulna (most common), fracture of the ulna with proximal radioulnar joint (PRUJ) dislocation (Monteggia fracture), fractures of the radius with distal radioulnar joint (DRUJ) dislocation (Galeazzi fracture), and isolated fractures of the ulna.
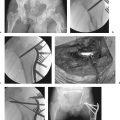
The radius and ulna must be considered together during injury management because the forearm acts a unit rather than as a pair of individual long bones. The forearm is often compared to the lower leg in that the proximal radius and ulna form an articulation with the humerus similar to the knee joint. The distal radius can also then be compared to the ankle mortise. The main distinguishing feature of the forearm as compared with the lower leg is the rotation of the radius around the ulna during forearm pronation and supination. The surgeon must pay particular attention to restoration or maintenance of the anatomic bow of the radius and the integrity of the interosseous membrane (IOM), as well as the DRUJ/PRUJ articulations during surgical reconstruction (Fig. 18.1).2,3 Failure to restore the curvature of the radius to within 5% of the contralateral arm is associated with greater than 20% loss of forearm rotation.2,4 Residual angulation can also result in functional rotation limitations.
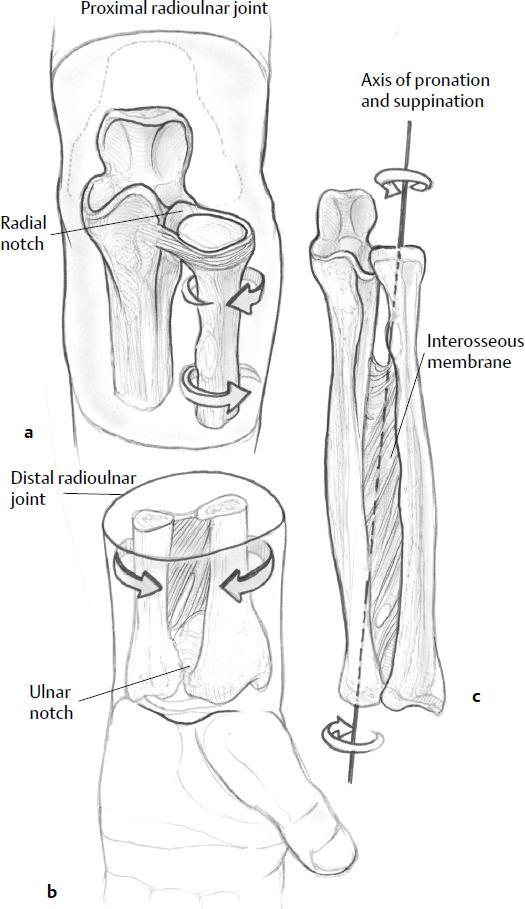
Due to these unique anatomic relationships, operative management is the cornerstone of treatment of forearm fractures in adults. Attention to surgical detail yields excellent rates of healing (98% in the radius and 96% in the ulna) and high levels of patient satisfaction.5–7 The necessity of achieving anatomic fracture reduction while working through the intricate soft tissues of the forearm creates a challenge, but predictable outcomes from surgical management are the rule.
Classification
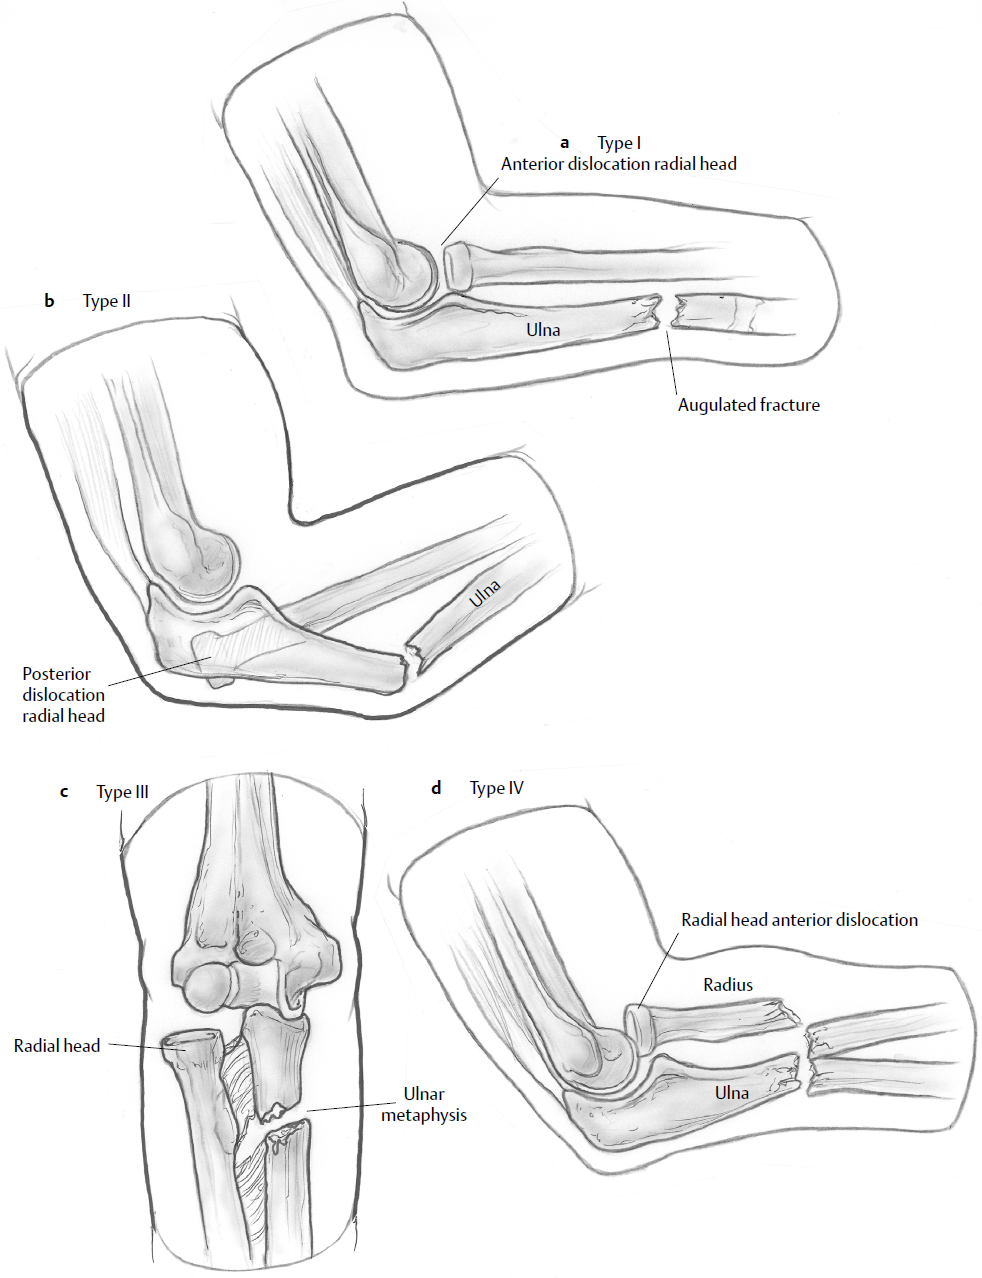
Like many other diaphyseal fractures, eponyms and descriptive terms are commonly used to classify and communicate forearm fracture patterns. These fractures are often grouped according to their proximal-distal location and the type of DRUJ/PRUJ injury. These variables influence the surgical approach and implant choice. The surgical approach to the radius varies depending on what portion of the shaft is fractured; thus, these fractures are generally divided into proximal, middle, and distal thirds. The type and stability of the DRUJ injury is addressed with a Galeazzi descriptor added to the isolated radius shaft fracture. Monteggia fractures are most commonly described using the Bado classification.8 This classification describes the direction of the dislocation of the radial head, which is the same as the apex of the ulna fracture, and is anterior (type I), posterior (type II), or lateral (type III). Type IV fractures involve an associated fracture of the proximal radius (Fig. 18.2). Isolated ulnar shaft fractures are generally classified simply as displaced or nondisplaced; displaced fractures are those with 50% or greater displacement.9
Nonoperative Treatment
Indications
There are only a few indications for management of forearm fractures without internal fixation. Fractures involving skeletally immature children are often treated with reduction and immobilization without internal fixation. In adults, the only forearm fracture that is commonly treated with only immobilization is the isolated ulnar shaft fracture. This injury is often caused by a direct blow, and is thus referred to as a “nightstick” fracture. The accepted criteria for nonoperative management of the isolated ulnar shaft are displacement less than 50% of the diaphyseal width and angulation less than 10 degrees.9–11 Fracture of the ulna in the proximal third of the diaphysis has been shown to be associated with a greater loss of pronation (average loss 12 degrees) compared with distal third fractures (average loss 5 degrees) following nonoperative management.2 Therefore, proximal ulna fractures more often require operative management.
It should be emphasized that the same principles do not adhere for the radius shaft because the isolated radius shaft fracture is usually not caused by a direct blow. There is a rotational and angular component to the injury that is transmitted through the IOM. One should suspect concomitant DRUJ injury in cases of apparently “isolated” radial shaft fractures because the DRUJ may have spontaneously reduced. As discussed previously, the forearm behaves like a ring or pretzel, and is very difficult to injure in a single place.
Reduction and Casting Techniques
In isolated distal ulnar shaft fractures with less than 50% displacement and 10 degrees of angulation, the interoseous membrane and radius create a stable ring, and these fractures are considered stable and amenable to mobilization.9–14 Immobilization that limits forearm rotation but permits elbow flexion and extension is preferred.15–17 Care should be taken to ensure that any cast or functional brace has adequate padding, to prevent pressure sores, and a good interosseous mold, to help maintain the fracture in acceptable alignment. Immobilization above the elbow is not necessary and has been shown to significantly reduce the number of good or excellent results.18
Displaced fractures of both the radius and the ulna are very unstable, as are displaced fractures of only the radius, and are associated with shortening, angulation, and some degree of injury to the distal radioulnar joint. Although it is recommended that these injuries be treated surgically, provisional splinting is necessary. Typically, a well-padded dorsal-volar plaster splint (i.e., a sugar-tong splint) is used with an interosseous mold to maintain alignment and provide some measure of stability while surgery is planned.
Functional Bracing of Isolated Ulnar Fractures
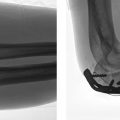
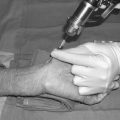
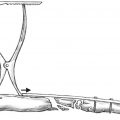
Functional bracing relies on the principle that a column of liquid (the fluid within the forearm) contained within a rigid boundary (the functional brace) is incompressible and therefore provides resistance to deformation. In the largest series of isolated ulnar shaft fractures published, Sarmiento et al14 found a 99% union rate and 96% good or excellent functional result with functional brace treatment. Functional braces allow free range of motion of both the elbow and the wrist and are lightweight and reasonably inexpensive; several studies have reproduced excellent results (Figs. 18.3 and 18.4).11,13,14,19,20 In patients whose fluid status is frequently changing, such as those with severe congestive heart failure (CHF) or patients requiring large-volume resuscitation, functional bracing may not be effective.

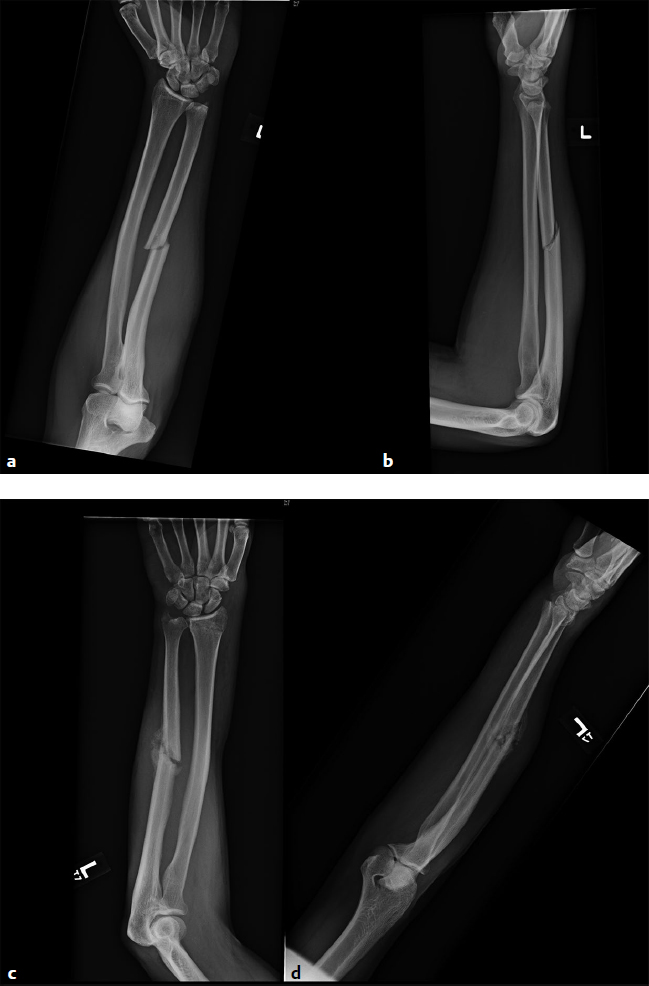
Despite the good results achieved with functional bracing, there is also evidence that good results are possible with early mobilization. Cadaveric studies have shown that fractures with less than 50% displacement are stable in rotation.9 Several authors have recommended early mobilization with either an elastic compression bandage or complete freedom following 1 to 2 weeks of below-elbow splinting.9,18,21,22 A meta-analysis found that time to union was shorter in patients treated with early mobilization rather than with functional braces, whereas the numbers of good and excellent results were similar.17 There is currently not sufficient data to make a definitive recommendation for a specific method of nonoperative treatment of isolated ulnar diaphysis fractures.23
Surgical Treatment
Indications
All adult diaphyseal fractures of the forearm, with the exception of the minimally displaced, isolated ulna fracture described previously, are best treated by operative management.5,24,25 The goals of treatment are twofold: anatomic restoration of length, rotation, and curvature of both bones as well as the interosseous space, and provision of sufficient stability to enable early range of motion. These goals are best achieved by operative means in the adult with a forearm fracture.26
General Principles
Rigid internal fixation of forearm fractures is best achieved by following the traditional principles of fracture fixation. Three types of fixation are generally possible:
Compression plate technique for transverse or short oblique fractures
Lag-screw interfragmentary compression independently or through a neutralization plate
Bridge or spanning plate technique for comminuted or segmental fractures
Other types of fixation, such as intramedullary stabilization and external fixation, are used in unique circumstances, such as patients with severe soft tissue injury.
Due to the neurovascular anatomy of the forearm, internal fixation is most safely applied using direct open approaches. Although minimally invasive surgery is usually not possible, the importance of respecting the soft tissue integrity and periosteal blood supply in exposure and reduction cannot be overstated.
Preoperative Planning
A complete preoperative plan ensures that all equipment, personnel, special tools, and imaging will be ready and available. The type of implant to be used, as well as the location and length of the fracture influence the necessary exposure and the fixation sequence. Preoperative planning for forearm fractures is relatively simple and requires good-quality anteroposterior (AP) and lateral X-rays, tracing paper, a set of transparent templates of all implants to correct scale, and several marking pens. With digital images, the magnification is variable, but such X-rays usually include a marker or scale that can be used to calculate the correct size. Printing the images is often necessary. Computerized templates that eliminate the need for some of these supplies are also available.
Surviving the Night
Perform a thorough examination and documentation of the patient′s upper extremity neurovascular exam. A pulseless extremity is a surgical emergency and must be rapidly identified and managed. In addition, knowing the particulars of the pre-reduction and presurgical exam can shape treatment and rehabilitation protocols.
Remember that a forearm fracture in young males is the second most common injury associated with compartment syndrome. This is a diagnosis that can be made on clinical exam in an awake patient, with pain out of proportion usually being the most significant finding. An obtunded patient may require manual compartment pressure measurements. Be particularly watchful in high-energy and crush-type mechanisms of injury.
Recognize an open injury. Many forearm fractures can be tentatively reduced and splinted, and the patients can return at a later time for surgery. Open fractures necessitate a surgical debridement and irrigation in a timely fashion. Antibiotics and tetanus prophylaxis should also be administered.
Reduce and stabilize forearm fractures in a well-padded splint with a good interosseous mold. A sugar-tong splint is our preferred splint for most forearm fractures.
When dealing with a Monteggia fracture, ensure that the radial head is reduced and that it is articulating with the capitellum on all views. Leaving the radial head subluxated or dislocated can cause further cartilage damage or posterior interosseous nerve palsy.
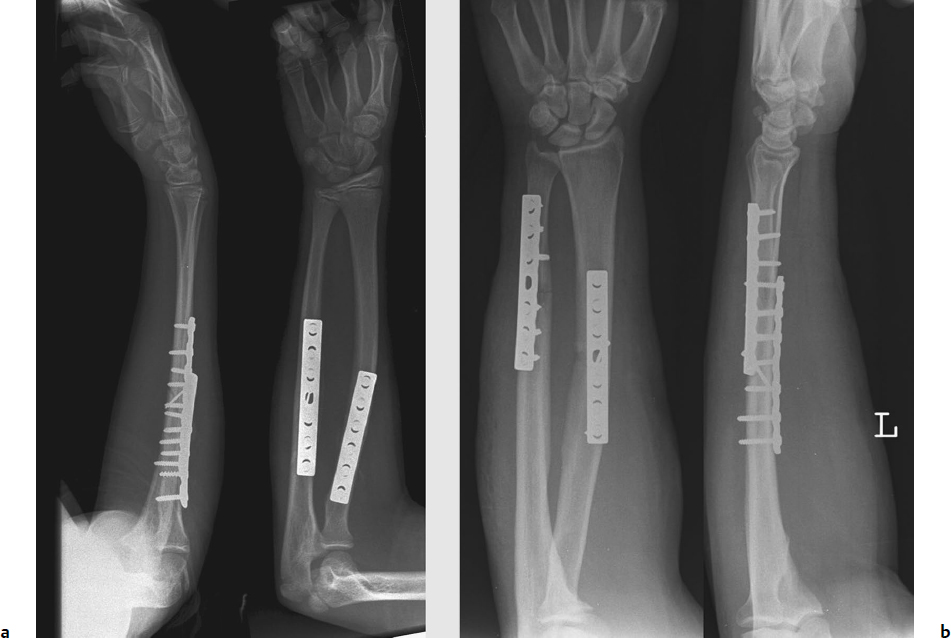
The plan should identify all the surgical personnel who will be needed, and should specify all the steps of the surgery, including the positioning, draping, tourniquet application, anesthesia, surgical approach, steps for fracture reduction and implant application, closure, dressing, and splinting. Fig. 18.5 is an example of a preoperative plan for a radius and ulna fracture. Comparison of the postoperative X-rays with the initial plan helps identify problems in the execution of the case and helps the surgeon prepare for future procedures as well.

Positioning and Draping
The typical procedure is accomplished with the patient in the supine position and the arm abducted perpendicular to the body on a radiolucent arm table. The forearm is placed in supination for the volar approach to the radius or pronation for the dorsal approach. The middle of the arm table should be located at the shoulder joint. It is important for the arm table to be placed onto the operating room table such that the patient′s shoulder is in the center of the arm table. A common mistake is placing the arm table too low, which creates difficulty in positioning the arm in supination for the volar approach. The elbow is generally flexed to 90 degrees to approach the ulna. This setup allows the surgeon and assistant to sit on either side of the arm table. A tourniquet should be applied to the upper arm, as far proximal as possible, and draping should be performed so that the elbow is within the surgical field, with enough room to flex and extend fully. If the patient is positioned prone or lateral for repair of another fracture, it is generally better to reposition the patient for the forearm injury. One exception to this is Monteggia fractures, which we have found to be easiest to address with the patient in a lateral position with the affected arm positioned over a radiolucent arm board. This positioning helps to achieve and maintain reduction with the elbow in extension. It also enables surgical access to the proximal radius as dictated by the fracture pattern.
Imaging
It is imperative that intraoperative imaging of the entire forearm can be obtained. Although the “mini C-arm” reduces radiation exposure and may be controlled by the surgeon, the small field of view limits its usefulness in assessing forearm fractures. The forearm and elbow can be visualized entirely with a conventional C-arm or with sequential images with the smaller machines. The surgeon needs to be able to compare and evaluate the PRUJ and DRUJ in relation to the radial curvature with fluoroscopy. Comparison views of the uninjured opposite forearm can be very helpful in understanding the adequacy of reduction obtained during surgery.
Surgical Anatomy and Choice of Surgical Approach
Video 18.1 ORIF of Isolated Radius Fracture
General Principles
The surgical anatomy of the forearm requires an understanding of its complex three-dimensional neurovascular anatomy in relation to tendons and muscles. To conceptualize the surgical anatomy of the forearm, it may be easiest to focus on the three main muscle groups, each supplied by a different nerve or nerves (Fig. 18.6). A surgical exposure that is made between any two muscle groups proceeds through an internervous plane. Once these internervous planes are understood, the location of neurovascular structures encountered during each approach can be learned safely. The typical approaches are the following:

Volar radius approach between the brachioradialis (innervated by the radial nerve) and the flexor carpi radialis (FCR, innervated by the median nerve)
Dorsal radius approach between the extensor carpi radialis brevis (ECRB, innervated by the deep radial nerve) and the extensor digitorum communis (EDC, innervated by the posterior interosseous nerve)
Ulnar subcutaneous approach between the flexor carpi ulnaris (FCU, innervated by the ulnar nerve) and the extensor carpi ulnaris (ECU, innervated by the posterior interosseous nerve)
The first group of dorsal muscles in relation to the radius is the “mobile wad of three,” which lies along the proximal and lateral forearm border. These three muscles are the brachioradialis (BR), extensor carpi radialis longus (ECRL), and ECRB. The radial nerve innervates the BR and ECRL, whereas the posterior interosseous nerve (PIN), originating from the deep posterior branch of the radial nerve, supplies the ECRB. Despite the fact that this muscle group is innervated by two nerves, the mobile wad should be thought of as a single group because no surgical approach divides these muscles. The approaches to the radius are on either the volar or dorsal aspect of this muscle group. Dorsal to this muscle group are the finger and thumb extensors: EDC, abductor pollicis longus (APL), extensor pollicis longus (EPL), and extensor indicis proprius (EIP). They are innervated by the posterior interosseous nerve.
Along the volar and radial aspect the forearm is the flexor-pronator group. Although this group of eight muscles is supplied by two different nerves (median and ulnar), it should be considered as a single group because very few approaches for the radius shaft pass between or divide muscles in this group. The flexor-pronator group consists of three layers: superficial (pronator teres, FCR, palmaris longus, and FCU), middle (flexor digitorum superficialis [FDS]), and deep (flexor digitorum profundus [FDP], flexor pollicis longus [FPL], and pronator quadratus).
Considerations for Exposures
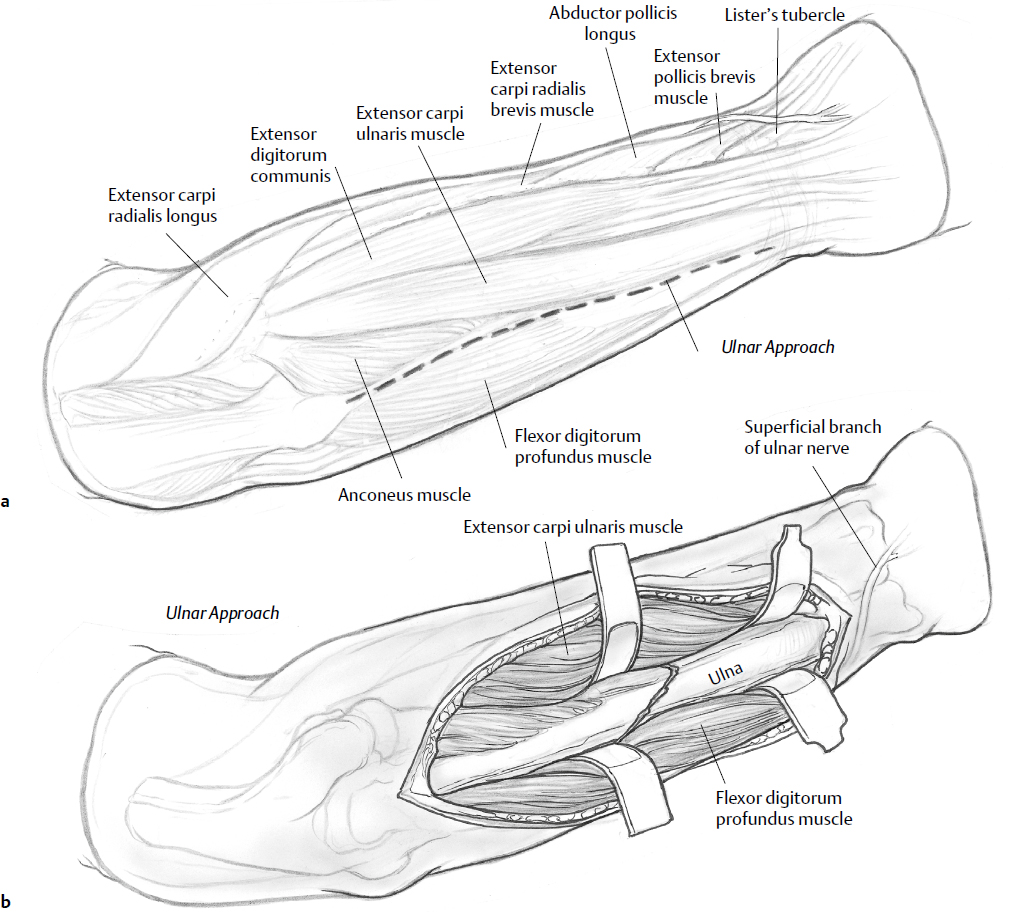
The approach to the ulna is relatively straightforward due to its subcutaneous location. It is approached safely and easily between the extensor and flexor-pronator groups (Fig. 18.7), specifically the ECU and FCU muscles. This is an internervous dissection between the PIN (ECU) and the ulnar nerve (FCU). Protection of these nerves is accomplished by keeping the dissection near to the bone. The ulnar nerve is most at risk as it travels volar to the FCU, between the FDP and the FDS. Ensure that the dissection does not stray into the substance of the muscle, endangering the nerve. The ulnar artery travels with the ulnar nerve and is similarly protected if dissection of the FCU remains subperiosteal. At the most distal extent of the approach to the ulna, the dorsal cutaneous branch of the ulnar nerve may be in the operative field. The dorsal branch arises about 5 cm proximal to the wrist joint, but crosses dorsally, in the area of the ulnar styloid, superficial to the extensor retinaculum. The nerve should be retracted in the distal and dorsal direction when such distal fixation is necessary.
The radius exposure involves a classic volar Henry approach27 (Fig. 18.8) or a dorsal Thompson approach (Fig. 18.9).28 There are several considerations in choosing the appropriate approach. The position of the plate in relation to bending forces on the fracture is an important factor. A plate placed on the dorsal or dorsoradial surface (via the dorsal approach) will be applied on the “tension” side of the fracture, which is advantageous.29 However, this biomechanical advantage can be outweighed by the more complex dorsal exposure and subsequent danger to the neurovascular structures in the midforearm.30 The PIN branches off from the deep radial nerve anterior to the lateral epicondyle.31 The PIN then pierces the supinator muscle, diving between the two heads of the muscle to wind around the posterior surface of the radius. In 25% of individuals, the PIN will come into direct contact with the radial neck, placing it in danger if retractors are placed around the proximal radius. The PIN continues distally within the body of the supinator muscle and emerges dorsally about 1 cm proximal to the distal border of this muscle.


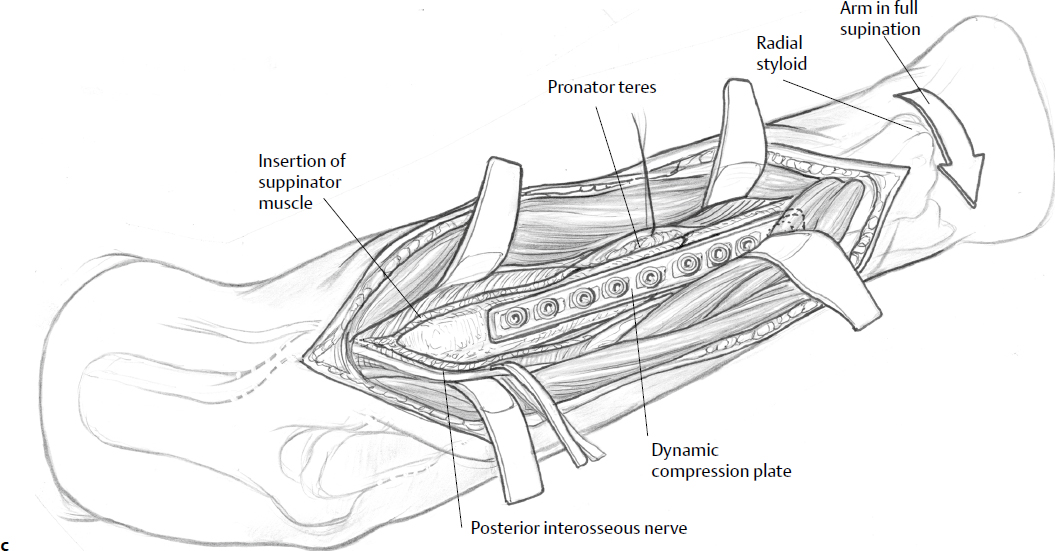
Although the superficial dissection is between the ECRB and the EDC, the PIN is at risk during the deeper dissection in the dorsal approach. If the fracture is in the proximal radius, the PIN can be identified proximal to the supinator and the dissection within the supinator can be carried out posterior to the PIN. If the fracture is more distal, then the PIN must be dissected as it emerges from the supinator. The difficulty in this region is that the PIN branches as soon as it emerges from the supinator. Therefore, the volar approach is more commonly used.
The volar approach is between the radial artery and superficial radial nerve. In the midforearm, the radial artery is easily mobilized in the ulnar direction. Although the plate is not applied to the tension side of the radius, there is long flat surface in which to apply the plate. The anatomic limit of volar fixation proximally is the biceps tendon and tuberosity. During proximal exposure of the radius, the radial artery and the PIN become more at risk. For fractures that require fixation proximal to the biceps tuberosity, an anterior exposure can still be used with plate application along the radial and dorsal surface.
In the proximal forearm, the radial artery arises from the bifurcation of the brachial artery just below the bend of the elbow at the level of the neck of the radius. There are several branches that require identification during an exposure proximal to the bicipital tuberosity. The radial recurrent artery arises immediately below the elbow and lies on the supinator muscle. There are also several muscular branches to the brachioradialis in this region that traverse the surgical plane in the volar approach. Therefore, these branches must be identified and ligated before the supinator muscle can be visualized. Particularly in a muscular forearm, the surgical wound is quite deep at this point, and identification and ligation of these arteries can be quite difficult at the bottom of a deep surgical approach. Thus, our suggestions for choice of surgical approach to the radius are as follows:
Proximal third: fracture is proximal to the biceps tuberosity; use the dorsal approach
Fracture at the junction of the proximal and middle forearm: fracture is distal to tuberosity, but fixation is necessary proximal to the tuberosity; use either the dorsal or volar approach, with plate application on the dorsal-radial aspect of the radius
Middle third: fixation is completely distal to the tuberosity; use the volar approach
Distal third: volar approach
The sequence of stabilization is dependent on several factors. The ulna is the stable segment of the forearm as the radius rotates around the ulna; thus, initial fixation of the ulna provides a stable platform and template for the radius in terms of restoration of length and gross alignment of the forearm. However, it may be more difficult to stabilize the ulna with the elbow flexed, because there is very little forearm stability during the ulnar exposure and stabilization procedure. For this reason, many surgeons advocate initial stabilization of the radius. The final and perhaps most important consideration is the fracture pattern. Fixation of the simpler fracture first is most practical and facilitates the reduction of the companion bone with the more complicated fracture pattern.
Surgical Techniques
Video 18.2 ORIF of a “Both Bone Forearm Fracture”
Ulna
The patient should be positioned supine as previously discussed. The incision is straight and made along the subcutaneous border of the ulna, which can be identified along its length by palpation. The length of the incision is determined by the fracture pattern, generally extending 3 to 5 cm on either side of the fracture. A shorter incision can be used initially, with subsequent extension as dictated by the fracture. If the ulna is to be stabilized first, it may be possible to delay inflation of the tourniquet until approaching the radius. It is important to limit the tourniquet time, which can effect postoperative pain.32 In the distal forearm, there is a broader fascial expansion between the FCU and ECU, thus creating a relatively straightforward exposure. More proximally, some of the fibers of the ECU or FCU extend across the ulna, and the dissection may require fascial division and then muscle elevation to expose the proximal ulna. The fracture characteristics and periosteal injury dictate whether to apply the plate on the volar or dorsal surface (Fig. 18.10). The subcutaneous border is the tension side of the ulna, but the plate can be very prominent in this location. The fixation is therefore often performed with the plate placed beneath the volar or dorsal musculature.
Dorsal Approach to the Radius
The incision and deeper exposure are centered along a line extending from the lateral epicondyle of the distal humerus to Lister′s tubercle of the distal radius. The subcutaneous fat is cleared from the underlying fascia so that the interval between the ECRB and the EDC can be identified. Both muscles have fibers running longitudinally, making it difficult to identify the intermuscular interval in the proximal exposure. The ECRB fibers may also be underneath the fascia of the ECRL. A distal separation of the ECRB and EDC muscle fascia is often easier with subsequent proximal division directly to the lateral epicondyle. More distally, the APL and extensor pollicis brevis (EPB) muscles (“outcropping muscles”) cross the surgical field. The distal interval is between the ECRB and the proximal edge of the APL. The superficial radial nerve is located just radial to this interval. The APL and EPB can then be elevated and retracted proximally or distally to complete the exposure to the bone.
Once the proximal ECRB and EDC separation is achieved, the supinator muscle must be visualized. The PIN lies within the supinator muscle and must now be identified. The nerve can be identified in two ways. Working proximal to distal, the origin of the ECRB and a portion of the origin of the ECRL are detached from the lateral epicondyle and then retracted laterally. The PIN then must be respected and protected during the exposure. In the proximal portion of the radius and radial neck, the PIN should be retracted in an anterior direction. The supinator is divided along the posterior one third, and the nerve is elevated with the anterior supinator fibers. The forearm is maintained in a pronated position to keep the nerve as far away as possible from the plane of dissection.
The more difficult dissection is in the midshaft of the forearm and in the junction between its middle third and distal third. Once the PIN exits the supinator it supplies branches to the EDC and then to the APL, EPB, EPL, and EIP. Most of these branches are directed toward the ulnar or posterior aspect of the forearm. The APL and EPB branches come off the nerve toward the radial aspect. The branching pattern must be identified and the nerve must be mobile enough to retract in anterior and posterior directions. The plate often is located just beneath the PIN in this location. It must be slid under the nerve during placement. Including the plate hole location nearest the crossing PIN in the surgical dictation can be useful if reoperation is required.
If exposure to the radial neck is not necessary, then an alternative approach is to identify the supinator origin along the radial aspect of the radius. This exposure utilizes a deep interval between the supinator and pronator teres. The supinator muscle can then be mobilized from the radial shaft with subperiosteal elevation, thereby also mobilizing the PIN within the supinator in a posterior or ulnar direction. This exposure may be extended distally to the proximal edge of the APL and EPB musculature. Any further distal dissection must be carried out under the APL/EPB and then the EPL/EIP as these muscles also originate from the ulnar aspect of the forearm and then extend to the radial side of the wrist.33 Final dissection in the distal radius is between the EPL and EDC (third and fourth compartments).
Stay updated, free articles. Join our Telegram channel

Full access? Get Clinical Tree


