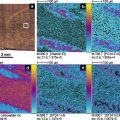
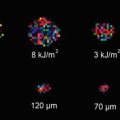
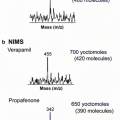
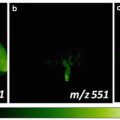
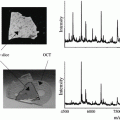
Fig. 1
General scheme of MSI technology and its application to mapping plant metabolites. Acquisition occurs by collecting mass spectra for each pixel and processing this array of spectra into representative 2D images of specific m/z values
2 Materials
2.1 Reagents/Equipment
1.
Gelatin (100 mg/mL in deionized water).
2.
Cryostat.
3.
25–75–0.8 mm (width-length-thickness) indium tin oxide (ITO)-coated glass slides.
4.
2,5-Dihydroxybenzoic acid (DHB): 150 mg/mL in 50% methanol/0.1% formic acid v/v (airbrush) or 40 mg/mL in 50% methanol/0.1% formic acid v/v (automatic sprayer).
5.
Deionized water.
6.
Methanol.
7.
Airbrush coupled with 75 mL steel container.
9.
Sublimation apparatus.
10.
Scanner.
2.2 Instrumentation
1.
An ultrafleXtreme MALDI-TOF/TOF (Bruker Daltonics, Billerica, MA, USA) analyzer equipped with a 2 kHz FlatTop smartbeam-II™ Nd:YAG laser (spot diameter down to 10 μm) can be used for imaging. Other types of MALDI mass spectrometers may also be used. Acquisitions can be performed in positive or negative ion reflectron mode depending on the sample type.
2.
Instrument parameters for a Bruker MALDI-TOF/TOF can be set using flexImaging and flexControl software (Bruker Daltonics). To produce ion images, spectra can be generated by averaging 500 laser shots over the mass range and collected at 25–100 μm intervals in both the x and y dimensions across the surface of the sample. The mass spectra can be externally calibrated using DHB matrix peaks or external standards applied directly to the glass slide.
3 Methods
3.1 Tissue Preparation
Sample preparation is a crucial step in producing reproducible and reliable mass spectral images. The quality of the images greatly depends upon factors such as tissue fixing methods, embedding medium, and slice thickness. Microwave irradiation and heat denaturation with the Denator Stabilizer T1 (Gothenburg, Sweden) have been reported to prevent postmortem protein degradation by deactivating proteolytic enzymes [11]. For imaging applications, ideal section thickness should be the width of one cell; 8–20 μm thickness is appropriate. Thicker sections tend to have better tissue integrity (i.e., less tearing or folding) but thinner sections typically result in better sensitivity.
1.
Trim the root nodule from the plant, leaving 3–4 mm of root attached to the nodule (1–2 mm on each side of the nodule).
2.
3.
Use forceps to orient the tissue as desired.
4.
Once the tissue is stuck to the bottom of the cup, use a syringe or pipet to cover the tissue with more gelatin (approximately 3–5 mm higher than the tissue) (see Note 4 ). Make sure that the tissue is completely surrounded by gelatin on all sides and there are no bubbles present in the gelatin (see Note 5 ).
5.
Flash freeze the tissue by placing the cup in a dry ice/ethanol bath or gradually freeze by placing the cup on dry ice only until the gelatin hardens and becomes opaque (see Note 6 ).
6.
Store tissue in −80 °C freezer until use.
7.
Remove frozen tissue from the −80 °C freezer, cut away the plastic cryostat cup, and trim excess gelatin (approximately 3–4 mm on each side of the tissue). Mount the embedded tissue to the cryostat chuck with a dime-sized amount of optimal cutting temperature (OCT) media (see Note 7 ). Place in cryostat box until the OCT solidifies.
8.
Prior to cryostat slicing, allow the chuck and gelatin to equilibrate in the cryostat box to the appropriate temperature (approximately 15 min) (see Note 8 ).
10.
11.
For 3D imaging, obtain multiple slices that are evenly distributed throughout the z-axis of the tissue and thaw mount each section individually onto the ITO-coated glass slide(s) (see Note 12 ).
12.
Place the ITO-coated glass slides with the tissue sections in a desiccator for at least 30 min before matrix application.
3.2 Matrix Application
MALDI requires deposition of an organic, crystalline compound, typically a weak acid, on the tissue of interest to assist analyte ablation and ionization [12]. Choosing a MALDI matrix and its application method is essential for quality mass spectrometric imaging experiments. Conventional matrices include CHCA (α-cyano-4-hydroxycinnamic acid) and DHB. Less traditional matrices such as DAN (1,5-diaminonaphthalene), DMAN (1,8-bis(dimethylamino)naphthalene), DHPT (2,3,4,5-tetra(3′,4′-dihydroxylphenyl)thiophene), TiO2 nanoparticles, and ionic matrices are being used and are reported to improve spectral quality, crystallization, and vacuum stability [13–17]. Different matrices provide different amounts of coverage, signal intensity, matrix interference, and ionization efficiency. It is important to choose a matrix that gives the best results for the particular analytes of interest. The matrix application technique also plays a role in the quality of mass spectral images. Three matrix application methods are presented here: airbrush, automatic sprayer, and sublimation. Airbrush matrix application has been widely used in MALDI imaging and is relatively fast and easy, but is less reproducible and sometimes causes diffusion of analytes [18]. Automatic sprayer systems, like the TM-Sprayer, have been developed which remove the variability seen with manual airbrush application, making the spray more reproducible, but is more time consuming. Sublimation is a dry matrix application technique that is becoming more and more popular for mass spectral imaging of metabolites and small molecules [19]. Sublimation reduces analyte diffusion, but lacks the solvent necessary to observe higher mass compounds.
3.2.1 Airbrush Application of MALDI Matrix
1.
Thoroughly clean the airbrush solution container and nozzle with methanol every time before matrix application.
2.
Fill the solution container with DHB matrix solution (150 mg/mL in 50% methanol/0.1% formic acid v/v) and place the airbrush approximately 35 cm from the glass slide (see Note 13 ).
3.
Apply 10–15 coats of matrix on the surface of the slide with a spray duration of 10 and 30 s drying time in between each coat.
4.
Thoroughly clean the airbrush again with methanol when finished to avoid clogging from the matrix solution.
3.2.2 Automatic Sprayer Application of MALDI Matrix
1.
Start compressed nitrogen-flow to the TM-Sprayer to 10 psi.
2.
Turn on the TM-Sprayer, and set valve to the “Load” position.
3.
Set the sprayer method with the TM-Sprayer software (see Note 14 ) and turn on the solvent pump to approximately 0.250 mL/min.
4.
Use a syringe to inject your matrix solution (40 mg/mL DHB in 50% methanol/0.1% formic acid v/v) into the sample loop with 20% overfill.
5.
Place ITO-coated glass slide with tissue slices into the spray chamber.
6.
Switch valve to “Spray” and wait for 1–2 min for the matrix to reach the nozzle tip.
7.
Start sprayer method.
8.
When finished, switch valve back to “Load” keeping the pump flow on and flush the loop with 50 % methanol three times.
9.
Turn the temperature back down to 30 °C. Wait for the temperature to come to at least 50 °C and turn off the pump, nitrogen, and sprayer system.
3.2.3 Sublimation Application of MALDI Matrix
1.
Weigh out 300 mg DHB into the bottom of the sublimation chamber as shown in Fig. 2a.
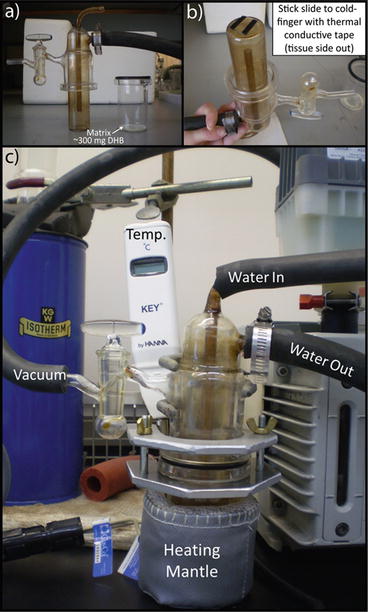

Fig. 2
Labeled photograph of sublimation apparatus setup. (a) Weigh out the matrix and place it in the bottom portion of the sublimation chamber. (b) The ITO slide with the tissue slice on it is attached to the underside of the condenser by thermal conducting tape. (c) Overall setup of the sublimation chamber connected to water, vacuum pump, and heating mantel and monitoring the temperature
2.
3.
Clamp the top and bottom of the sublimation chamber together and connect the vacuum and water as shown in Fig. 2c.
4.
Place sublimation chamber in a heating mantle that is at room temperature.
5.
Turn on the vacuum pump. After 15 min turn on the water. Wait for an additional 5 min and turn on the heating mantle.
6.


The heating mantle should reach 120 °C over the course of 10 min.
Stay updated, free articles. Join our Telegram channel

Full access? Get Clinical Tree


