Image Optimization
Once the instrumentation has been reasonably mastered, the examiner can then strive to optimize the image desired. The goal is to have the image centered with sufficient clarity and the best resolution possible. The desired image should fill the majority of the screen. The settings should provide the optimal contrast between the tissues being examined. Appropriate labels and markings should also be added for future reference and for recognition by outside observers. Not all ultrasound machines are designed the same and some have frequencies, focal zones, and gray scale mapping that are already determined. Most machines have “pre-sets” with appropriate settings already determined for the type of tissue being scanned. Despite this, the examiner should have an understanding of the various components of ultrasonography to optimize the image in different circumstances.
ORIENT THE IMAGE
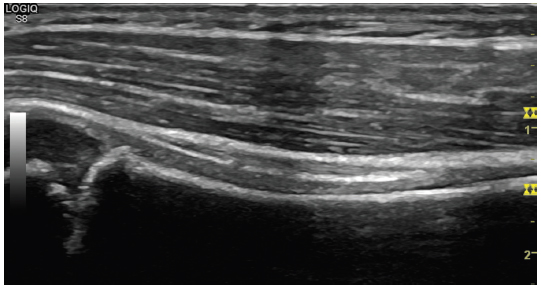
The image should be oriented in a reasonably consistent fashion. By convention, when a structure is imaged in long-axis plane, it is typically oriented so that the left of the screen is cranial and the right of the screen is caudal (Figure 4.1). There is generally less convention with respect to imaging structures in short axis. Some maintain the left of the screen as the anatomic right and others orient the left of the screen as the medial aspect of the body. It is probably best to perform short-axis live scanning in a position that makes sense with the orientation of the patient with respect to the screen. For example, when the transducer moves in the medial direction on the body, it should move the same direction on the screen (Figure 4.2).
FIGURE 4.1 Sonogram of a long-axis view of the long head of the biceps brachii tendon. The image is oriented so that the left portion of the screen is toward the head.
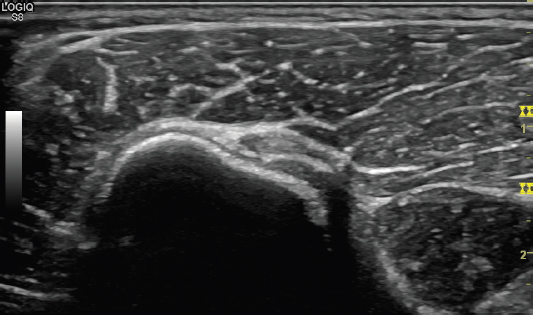
FIGURE 4.2 Sonogram of a short-axis view of the biceps brachii tendon shown in Figure 4.1. The left portion of the screen corresponds to the anatomic right (lateral) of the patient.
CENTERING THE IMAGE WITH THE TRANSDUCER
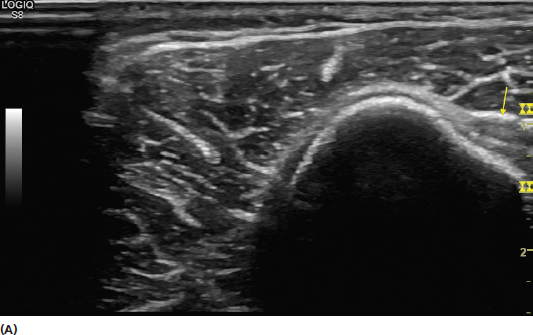
The image should be centered in the screen and maintained in that position during live scanning (Figure 4.3). This transducer skill should be practiced when first starting to scan. It is needed to prevent the desired image from repeatedly drifting out of view when scanning more rapidly.
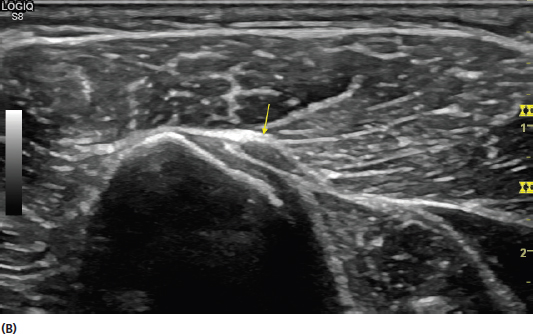
FIGURE 4.3 Sonograms demonstrating proper centering of the image. The image in (A) shows the structure of interest (yellow arrow) too far to the right in the picture. The image in (B) shows proper placement of the structure of interest in the center.
SELECT THE APPROPRIATE DEPTH
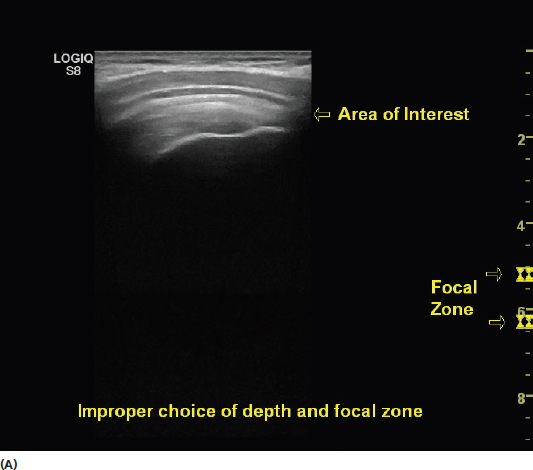
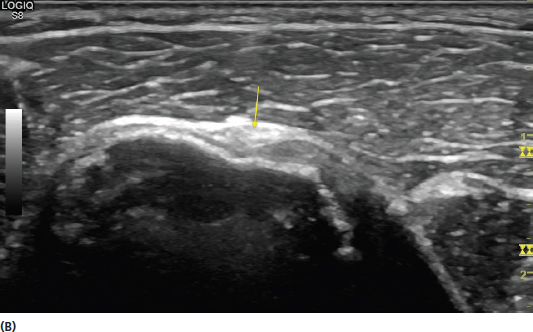
The depth should be set at the level that places the desired tissue in the majority of the screen. Too much depth results in the desired image appearing too small with essentially wasted space. If the depth is too low, the desired image could be truncated or there can simply be insufficient contrast from surrounding tissue to provide adequate perspective (Figure 4.4).
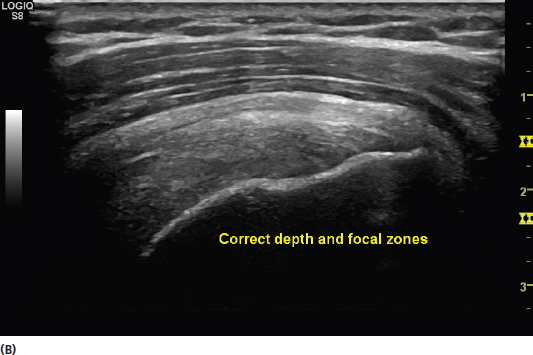
FIGURE 4.4 Sonograms demonstrating improper and proper depth setting and use of focal zones. In (A), the setting is too deep for the image desired resulting in wasted space and decreased visualization if the pertinent structures. The focal zones are also set improperly diminishing the resolution of the structure (supraspinatus tendon) intended. The image in (B) demonstrates appropriate setting of the depth and focal zones for image optimization.
SELECT THE APPROPRIATE FREQUENCY
As described in Chapter 3, higher frequencies are used for resolution of more superficial structures and lower frequencies are used for better tissue penetration. There are no hard and fast rules regarding the precise frequency for each specific depth as it can vary due to a number of factors including tissue thickness. A general rule is that the highest frequency that provides adequate tissue penetration should be utilized (Figure 4.5).
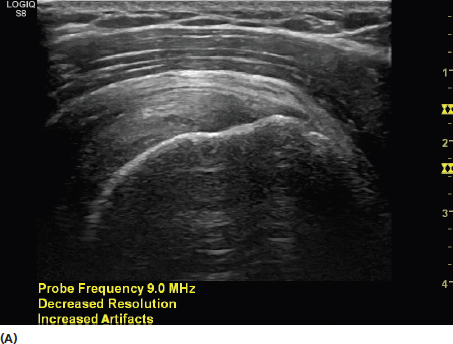
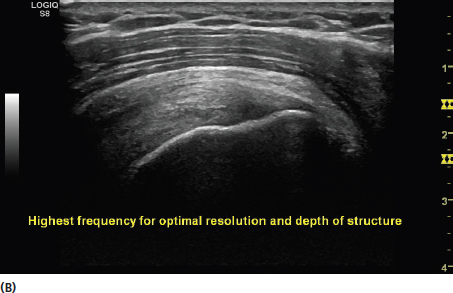
FIGURE 4.5 Sonograms demonstrating the effect of frequency on the image. In (A), the frequency is set too low (9 MHz) for the relatively superficial structure (supraspinatus tendon) resulting in an unnecessary artifact. In (B), the appropriate frequency (15 MHz) provides a clearer image of the tendon with less artifact.
SELECT THE APPROPRIATE FOCAL ZONE
The focal zone is the horizontal line on the screen that should be placed at the level of greatest interest on the screen. The focal zone refers to the location where the ultrasound beams converge to provide the greatest level of clarity (Figure 4.6). Failure to maintain the focal zone in the proper location with scanning will result in decreased resolution at the point desired (Figure 4.4). More than one focal zone can be used if the area of interest is larger than the single horizontal level; however, additional focal zones tend to decrease the frame rate. The frame rate refers to the speed in which the image regains clarity after the transducer is moved. For this reason, too many focal zones make the image harder to see when the transducer is moved rapidly.
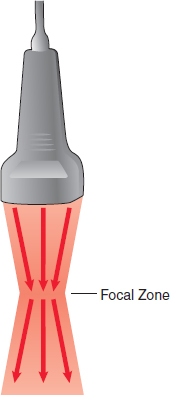
FIGURE 4.6 Illustration demonstrating the focal zone of the ultrasound beam. This is the region where the majority of the incident sound waves converge to create the greatest degree of clarity.
SELECT THE APPROPRIATE GAIN
The gain increases or decreases the brightness of the image. The gain is typically set to provide the right contrast between the tissues being observed. This is often a matter of preference but extremes of high or low gain should generally be avoided (Figure 3.8).
SELECT THE GRAY SCALE MAPPING WHEN NEEDED
The gray scale mapping can be utilized to provide the desired color to the picture. This is often merely personal preference, but the mapping should be used that gives the optimal contrast between the tissues of interest (Figure 3.11).
MINIMIZE ANISOTROPIC ARTIFACT
Anisotropic artifact is discussed in more detail in Chapter 13. This artifact occurs when the incident sound waves are not orthogonal to the desired structures resulting in less return of the waves to the transducer and resultant decreased clarity of the image (Figure 4.7).
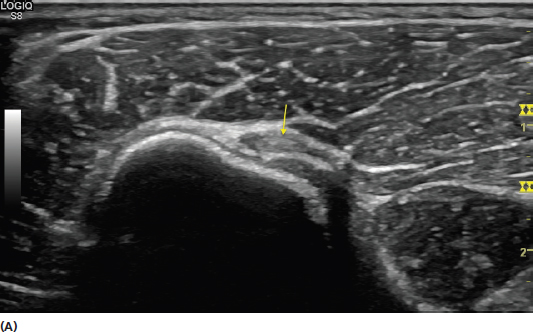
FIGURE 4.7 Sonograms demonstrating the effect of anisotropy on a biceps brachii tendon in short axis. In image (A), the incident beam has an angle of incidence that is greater than 0°, or less than perpendicular in relation to the tendon (yellow arrow). Note the more hyperechoic (brighter) signal intensity of the tendon when the incident beam is placed in a perpendicular position in relation to the tendon in (B).
ADD THE APPROPRIATE LABELS
The labels should readily identify the structures being evaluated in the picture and include the orientation and side of the body. In side-to-side comparison imaging, it is often appropriate to clarify the symptomatic side. Arrows to indicate specific areas of attention and measurement tools should also be placed when needed. The labels should be easy to read and positioned in a location that does not obstruct visualization of the desired image (Figure 3.18).
REMEMBER 
1) Always have clear orientation to the position of the image. Structures in long axis by convention should have the cranial aspect toward the left of the screen and the caudal end toward the right of the screen.
2) Make sure the focal zone is placed at the level of the structure desired.
3) Orient the incident sound waves in an orthogonal (perpendicular) position to the tissue desired to minimize anisotropic artifact.
Stay updated, free articles. Join our Telegram channel

Full access? Get Clinical Tree


