Study
Author
Outcomes
Clinical utility of ultrasound guidance for intra-articular knee injections
Berkoff et al. [2]
Image-guided Accuracy 96.7 % vs. anatomic (blind) 81.0 %, 75 % reduction in significant pain and 26 % increase in responder rate
A randomized controlled trial evaluating the cost-effectiveness of sonographic guidance for intra-articular injection of the osteoarthritic knee
Sibbitt et al. [5]
48 % less procedural pain, 42 % reduction in pain scores, 36 % increase in therapeutic duration, 58 % reduction in cost per responder per year
Table 6.2
Accuracy of knee joint injections
Author | Image-guided (%) | Anatomical (blind) (%) |
|---|---|---|
Cunnington et al. [6] | 91.4 | 81.8 |
Park et al. [7] | 96 | 83.7 |
Balint et al. [8] | 94.7 | 40.0 |
Table 6.3
Comparing location of ultrasound guided knee injections
Study | Approach | Accuracy (%) |
|---|---|---|
Comparison of sonographically guided intra-articular injections at three different sites of the knee [9] | Superolateral | 100 |
Midlateral | 95 | |
Medial | 75 |
Scanning Technique and Anatomy to Identify
Lay the patient supine with the knee flexed 20–30°. Place the probe longitudinally on the midline superior pole of the patella. From deep to superficial, visualize the femur, prefemoral fat pad, hypoechoic suprapatellar joint space, suprapatellar fat pad, and quadriceps tendon inserting onto the patella. Rotate the probe 90° to the axial (transverse) plane. From deep to superficial, view the femur, prefemoral fat pad, hypoechoic suprapatellar and parapatellar joint spaces, suprapatellar fat pad, and quadriceps tendon. Glide medial and lateral here to assess for fluid in the medial and lateral parapatellar recesses. Milking or compressing those areas may help delineate the joint space (Fig. 6.1).
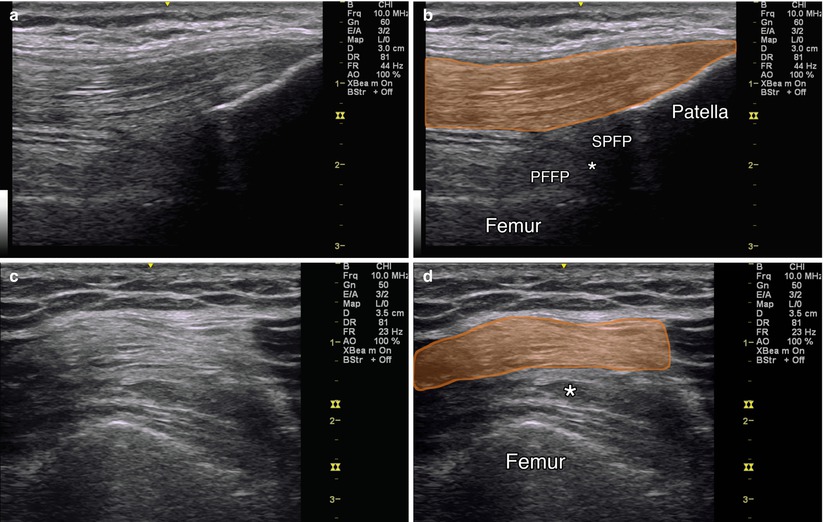
Fig. 6.1
(a) Sagittal view over suprapatellar joint recess. (b) Orange indicates quadriceps tendon, SPFP suprapatellar fat pad, PFFP prefemoral fat pad, asterisk indicates joint recess, patella and femur labeled. (c) Axial view over suprapatellar recess. (d) Orange indicates quadriceps tendon, asterisk indicates joint space, femur labeled
Injection Techniques: In-Plane Superolateral Approach
Patient positioning: Lay the patient supine, knee flexed 20–30°. Place a towel or pillow underneath the knee.
Probe positioning: Place the probe axial (transverse) over the distal thigh, superior to the patella (Fig. 6.2a). Suprapatellar joint fluid may be visualized directly under the quadriceps tendon or deep to the suprapatellar fat pad.
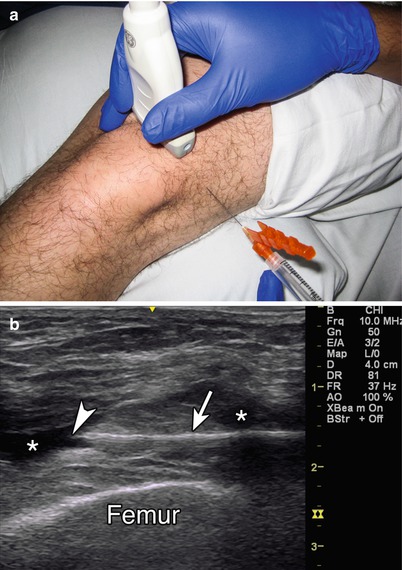
Fig. 6.2
(a) Example of probe position over suprapatellar joint recess with in-plane injection technique. (b) Arrowhead indicates needle tip within joint recess, arrow points to needle, asterisk indicates effusion, femur labeled
Markings: Identify the quadriceps tendon and muscles, periosteum, and fat pads to avoid these structures when injecting.
Needle position: Insert the needle in-plane from lateral to medial in the superolateral region of the knee.
Safety considerations: Identify and avoid any obvious vessels.
Pearls:
Fluid in the parapatellar recesses is dependent: Keeping the knee flexed allows joint fluid to collect in the suprapatellar space. Alternatively, one may milk the fluid from the parapatellar recesses into the suprapatellar pouch.
Insert the needle deep to the quadriceps tendon through the vastus lateralis, and keep the needle at a flat angle to avoid needling the tendon and allow for optimal visualization.
Vary the pressure on the transducer and use local anesthetic to hydrodissect the suprapatellar space if no effusion is present.
Equipment needed:
High-frequency linear array transducer (8 MHz+)
22G–25G 1.5″ needle (3″ for morbidly obese)
1 mL of steroid preparation
3–5 mL local anesthetic
Patellar Tendinosis
Patellar tendinosis or “jumper’s knee” is a common source of focal anterior knee pain for active, high-impact activity individuals [3]. Treating chronic patellar tendinosis is challenging given the low capacity for tendons to heal [4]. It is not clear why tendinosis develops. Histologically, there is evidence of tissue degeneration with failed reparative response and absence of inflammatory cells. Research on patellar tendinopathy does not support any one treatment as the most effective. Patellar tendon needling has been described using no injectate (needle alone), with sclerosing agents, autologous blood or platelet-rich plasma (PRP), and corticosteroids [10–13].
Scanning Technique and Anatomy to Identify
Lay the patient supine, knee flexed approximately 30°, with a pillow or rolled towel underneath the knees. Place the transducer longitudinally over the patellar tendon. Proximally, visualize the hyperechoic patella with the fibrillar patellar tendon coming off it and Hoffa’s fat pad immediately deep to the tendon. In patellar tendinosis, there will be tendon irregularity, thickening, areas of hypoechoic swelling, and potentially neovascularization [14]. Scan the entire width and entire length of the tendon from the inferior pole of the patella to its insertion onto the tibial tuberosity, in both short and long axis (Fig. 6.3).
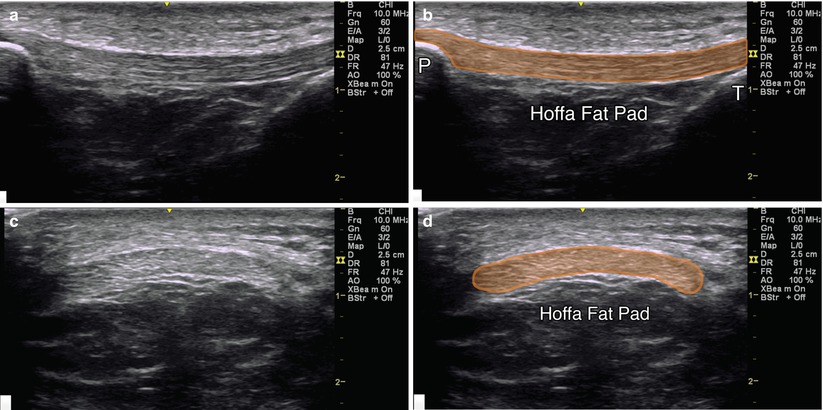
Fig. 6.3
(a) Sagittal view of patellar tendon. (b) Orange indicates patellar tendon, P patella, T tibial tuberosity, Hoffa fat pad labeled. (c) Axial view of patellar tendon. (d) Orange indicates patellar tendon, Hoffa fat pad labeled
Injection Techniques: In-Plane Axial Approach
Patient positioning: Lay the patient supine, knee flexed about 30° with a pillow or rolled towel placed underneath.
Probe positioning: Place the transducer over the middle of the patella to obtain an axial view (Fig. 6.4a).
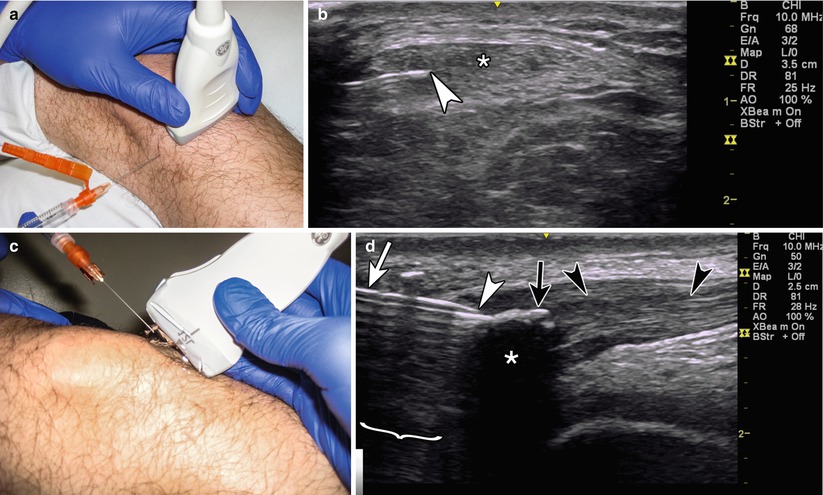
Fig. 6.4
(a) Example of axial probe position over patellar tendon with in-plane injection technique. (b) Arrowhead indicates needle tip, asterisk indicates patellar tendon. (c) Example of sagittal probe position with gel standoff over patellar tendon with in-plane injection approach.(d) Example of sagittal in-plane needling of a calcium deposition within patella tendon, white arrowhead indicates needle tip, white arrow indicates needle, bracket indicates reverberation, black arrow indicates calcium deposition, black arrowheads indicates patellar tendon, asterisk indicates acoustic shadowing
Markings: No significant vascular or neural structures need to be marked.
Needle position: Insert the needle in-plane from a lateral to medial or medial to lateral direction, aiming at the areas of greatest tendinosis.
Safety considerations: Care should be taken when injecting a tendon, as this may increase susceptibility to tendon rupture [15, 16].
Pearls:
Use a larger gauge needle to break up calcium deposits.
Increasing the gain on Doppler may help identify neovascularization.
Switch between long and short axis to visualize the entire area of tendinosis while redirecting the needle in all directions, both in and out of plane.
Use the “K-turn” – insert the needle, then retract, then adjust clockwise or counterclockwise, insert, then retract, and continue in this manner in order to increase the amount of tendon covered without having to reinsert the needle through the skin.
Equipment needed:
High-frequency linear array transducer (10 MHz+).
25 gauge, 1.5″ needle.
0.5 mL of steroid preparation or 2–4 mL of PRP or autologous whole blood.
1–3 mL of local anesthetic.
For PNT, use a larger (18–20 gauge) needle.
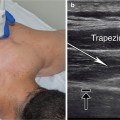
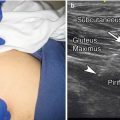
Pes Anserine Bursitis
Pes anserine bursitis is a common source of medial-sided knee pain, frequently associated with worsening knee OA, overuse, or repetitive trauma [17]. It typically presents with pain with walking and climbing or descending stairs [18]. Patients typically have tenderness to palpation over the conjoined tendon insertion of the sartorius, gracilis, and semitendinosus. Treatment typically consists of rest, nonsteroidal anti-inflammatory medications, physical therapy, and corticosteroid injections. The literature describes varying benefit from injections; however, prior injections were performed with an anatomical (blind) method. Finnoff et al. injected the pes anserine bursae under ultrasound guidance with an accuracy of 100 % compared to 50 % unguided [19]. It is not clear how well this translates to clinical improvement, however (Table 6.4).
Table 6.4
Accuracy of ultrasound guided versus blind pes anserine bursa injections
Study: pes anserine bursitis | Author | Accuracy |
|---|---|---|
Ultrasound-guided vs. blind | Finnoff et al. [19] | 100 % vs. 50 % |
Scanning Technique and Anatomy to Identify
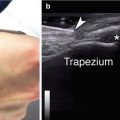
Place the probe in a transverse oblique orientation over the posterior medial knee. The semitendinosus, gracilis, and sartorius muscles can be seen in cross section and traced distally towards their insertion. From deep to superficial, identify the hyperechoic proximal tibia, fibers of the medial collateral ligament (MCL) oriented obliquely, pes anserine bursa, and three ovoid tendons superficially. This bursa is rarely seen, even when the patient is symptomatic, suggesting that “pes anserine bursitis” may more likely be a distal tendinopathy, medial geniculate neuritis, or tibial stress reaction (Fig. 6.5).
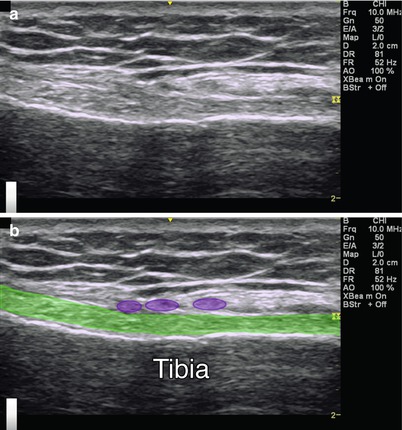
Fig. 6.5
(a) Sagittal view of the pes anserine bursa. (b) Green indicates medial collateral ligament, purple circles indicate pes anserine tendons, tibia labeled
Injection Technique: In-Plane Sagittal Approach
Patient positioning: Place the patient supine, knee extended and leg externally rotated with a towel underneath the knee to allow slight flexion.
Probe positioning: Place the transducer short axis (transverse) on the posteromedial aspect of the distal thigh. Move the transducer distally along the semitendinosus tendon, which helps with visualizing the gracilis and sartorius tendons. Identify the tendons as the transducer is moved distally and anteromedially. Rotate the transducer longitudinally relative to the fibers of the MCL, sagittal over the anteromedial tibia (Fig. 6.6a).
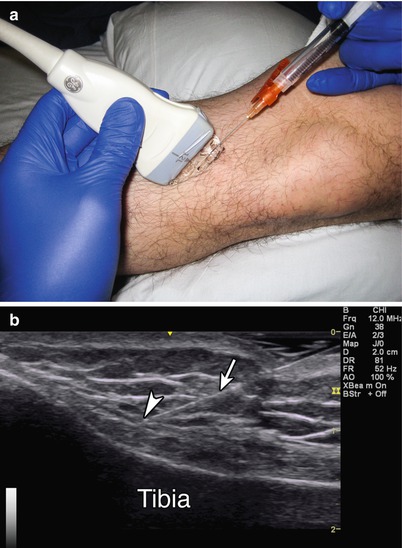
Fig. 6.6
(a) Example of sagittal transducer position with gel standoff over pes anserine bursa with in-plane needle approach. (b) Arrowhead indicates needle tip, arrow indicates needle, tibia labeled
Markings: To identify the central area of the pes anserine bursa, mark the skin over the middle of pes anserinus, where it crosses the anterior margin of the MCL.
Needle position: Insert the needle in-plane on the proximal or distal side of the transducer, targeting the bursa between the MCL and the pes anserinus.
Safety considerations: This is a superficial injection which increases the risk of steroid depigmentation and fat atrophy at the site of injection. Avoid injecting steroids directly into the MCL [15].
Pearls:
The pes anserine bursa is typically located 2.5–3 cm distal to the medial joint line [4].
The bursae lay between the pes anserine tendons and the MCL.
Equipment needed:
High-frequency linear array transducer (10 MHz+)
25G 1.5″ needle
1 mL of steroid preparation
2 mL local anesthetic
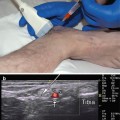
Tibiofibular Joint
The proximal tibiofibular joint (PTFJ) is an arthrodial sliding joint with great morphological variability. The PTFJ has been categorized into two main types by anatomic orientation: horizontal, with increased joint surface area and rotary mobility, and oblique, with less joint surface area and mobility. The joint supports 1/6 of the axial load of the leg. It is often overlooked as a potential cause of lateral knee pain, frequently mistaken for a lateral collateral ligament injury [20, 21]. Symptoms are nonspecific; patients may complain of joint instability or anterolateral knee and lateral calf pain that can be referred proximally or distally. Exacerbating factors may include stair climbing, hamstring pain or tightness, and knee and ankle movements [22]. Physical examination including manual pressure or grading laxity of the PTFJ did not correlate with the degree of arthritis seen in one study [23, 24].Therefore, an injection may provide both diagnostic and therapeutic benefits (Table 6.5).
Table 6.5
Accuracy of sonographically and palpation-guided PTFJ injections
Technique | Accurate (%) | Accurate with overflow (%) | Inaccurate (%) |
|---|---|---|---|
Sonographically guided | 67 | 33 | 0 |
Palpation guided | 17 | 42 | 42 |
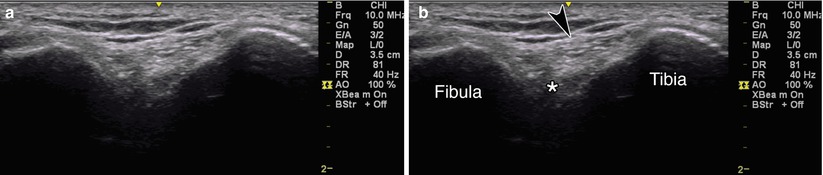
Scanning Technique and Anatomy to Identify
Place the patient in an oblique side-lying position with the lateral aspect of the affected knee towards the ceiling [25]. Slight flexion of the knee to 20–30° will widen the joint space. Palpate the PTFJ and place the transducer in a transverse–oblique view. Rotate the transducer for the best view of the PTFJ [26]. From deep to superficial, identify the joint space between the hyperechoic bony tibia and fibula, the anterior superior proximal tibiofibular ligament connecting the two bones, and superficial subcutaneous tissue (Fig. 6.7).