7 Pancreas
 Organ Boundaries
LEARNING GOALS
 Locate and identify the pancreas.
 Demonstrate the entire pancreas.
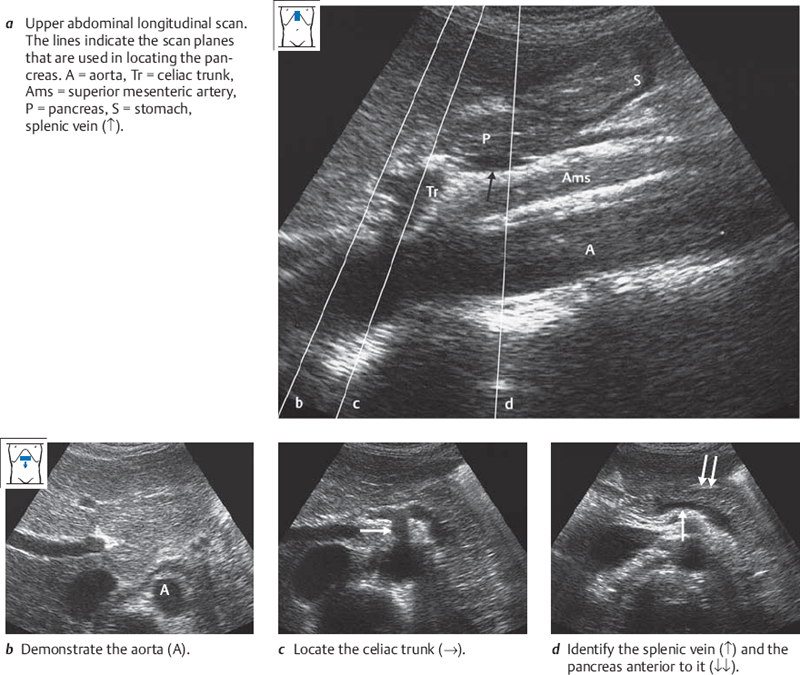
The pancreas is located in the retroperitoneum, bounded on each side by the duodenum and the spleen. It lies transversely in the epigastrium, its axis directed at a slight angle from lower right to upper left.
Locating the pancreas
Barriers to scanning
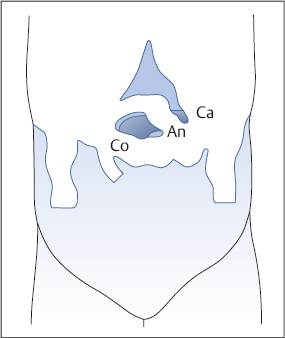
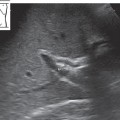
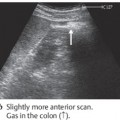
The pancreas is often difficult to locate because of its posterior position. The main barrier to scanning the pancreas is gas in the stomach and bowel (Fig. 7.1).
Optimizing the scanning conditions
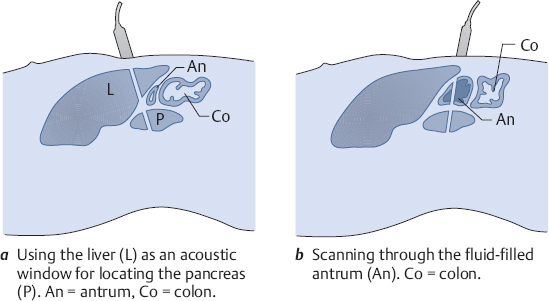
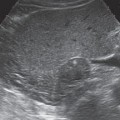
The pancreas, like the gallbladder, is best examined in the fasted patient. In some cases, visualization can be significantly improved by giving the patient an antigas medication. You can also apply local transducer pressure to push the gas aside. Of course, this should be done only after the other organs have been examined. Vision can be substantially improved by filling the stomach with water (500 ml, taken through a straw) (Fig. 7.2).
Organ identification
More than with other upper abdominal organs, identification of the pancreas relies on the use of landmarks. Your principal landmarks are the aorta and the splenic vein (Figs. 7.3–7.5).
Position the transducer for a high upper abdominal transverse scan, and angle the scan slightly upward into the liver. Identify the aorta and vena cava. Now move the scan plane caudally in small increments. In some cases you will have to repeat this pass several times and use both sliding and angling movements of the probe to scan around gas in the stomach and bowel. As you scan down the aorta, look for the landmarks shown in Figs. 7.3 and 7.4.
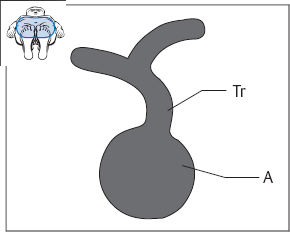
Fig. 7.3 Aorta (A) and celiac trunk (Tr). When you see this pattern in the transverse scan, you will find the pancreas at a slightly more caudal level.
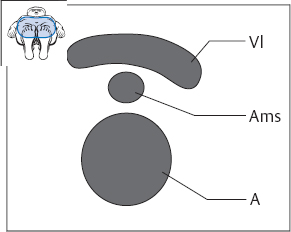
Fig. 7.4 Aorta (A) plus a transverse section of the superior mesenteric artery (Ams) and a longitudinal section of the splenic vein (Vl). When you see this pattern, you will almost always have the pancreas on the monitor. It appears as a gently curved structure passing anterior to the splenic vein. The ability to define the pancreas and delineate it from its surroundings will vary greatly from case to case.
Difficulties in identifying the pancreas
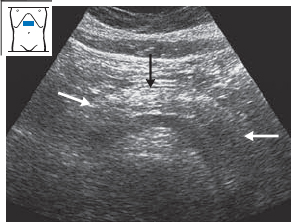
The series of images shown above were obtained under ideal scanning conditions. In most examinations, however, the conditions will be less than ideal and often the pancreas cannot be completely visualized (Figs. 7.6–7.8).
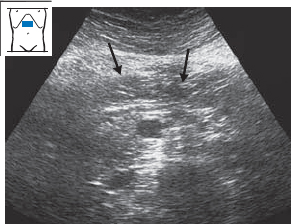
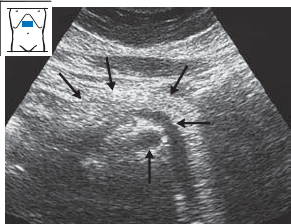
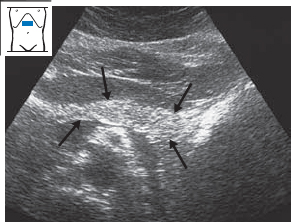
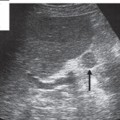
Fig. 7.7 Obesity and pancreatic lipomatosis. The superior mesenteric artery (↑) and splenic vein (←) are plainly seen, but the pancreas (↓↓↓) is poorly delineated.
Imaging the entire pancreas
KEY POINTS
Multiple transverse and longitudinal scans are needed to survey the pancreas because of its length (approximately 15 cm).
The tail of the pancreas can be scanned through the spleen.
The splenic vein is the landmark for locating the pancreas in the transverse scan.
Below you will learn a systematic method of imaging the pancreas using parallel upper abdominal transverse and longitudinal scans. The tail of the pancreas can also be visualized by scanning through the spleen. This approach is described further under Anatomical Relationships (p. 150).
Defining the pancreas in upper abdominal transverse scans
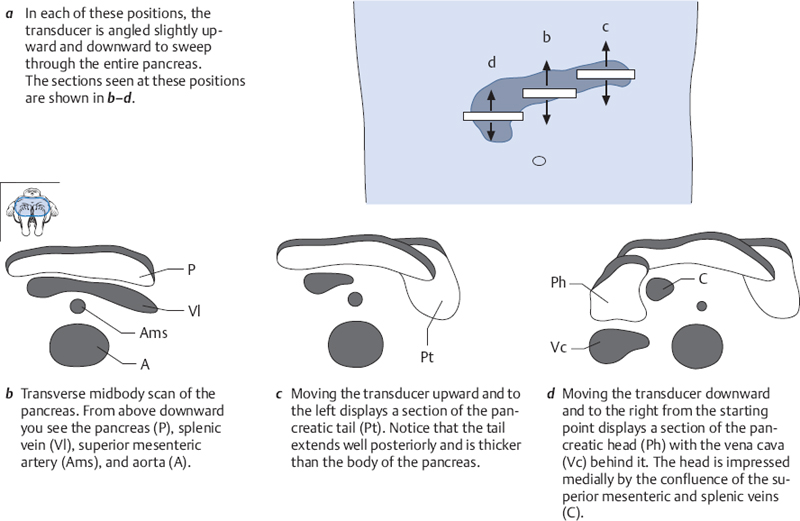
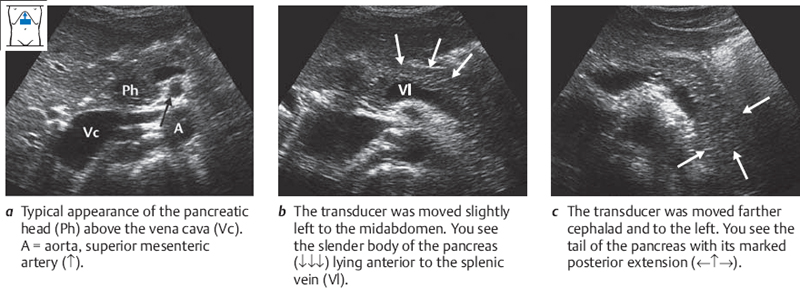
Due to the length of the pancreas, several passes are needed to survey the entire organ in transverse sections (Figs. 7.9, 7.10).
Obtain a longitudinal section of the pancreas anterior to the splenic vein (Figs. 7.9b, 7.10b). Notice the gently curved shape of the pancreas above the landmark. Sweep through this section several times.
Then slide the transducer toward the tail of the pancreas, i.e., upward and to the left (Figs. 7.9c, 7.10c). Observe how the shape of the pancreas changes. You will notice that vision becomes poorer as the scan moves to the left. Scan through the tail of the pancreas. Its shape is highly variable.
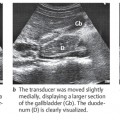
Now return to the starting point, and move the transducer to the right toward the head of the pancreas (Figs. 7.9d, 7.10a). Again, observe the change in shape. Sweep through the head of the pancreas several times. While the body and tail of the pancreas have a relatively smooth, elliptical shape in the transverse scan, the contour of the head shows irregular depressions at several sites.
The aorta, celiac trunk, superior mesenteric artery, and splenic vein are the landmarks for identifying the pancreas in the longitudinal scan.
Defining the pancreas in upper abdominal longitudinal scans
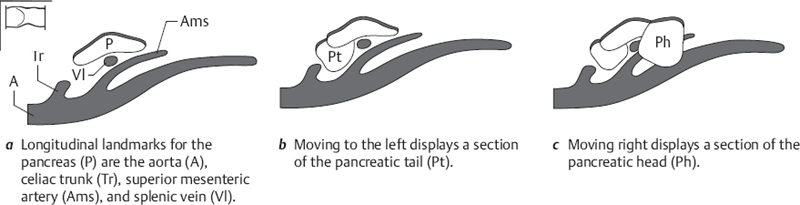
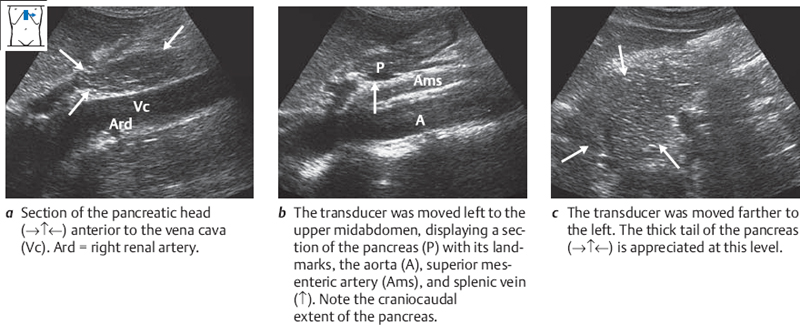
Start with the probe placed transversely on the upper abdomen, and define the body of the pancreas. While watching the screen, rotate the transducer to a longitudinal scan over the epigastrium. Keep the section of the pancreas in view, and angle the transducer slightly to locate the aorta. It will provide an aid to orientation. The key landmarks for locating the pancreas in the upper abdominal longitudinal scan are the aorta, celiac trunk, superior mesenteric artery, and splenic vein (Fig. 7.11a).
Concentrate on the pancreas. Scanned longitudinally, the pancreas presents a flat, oblong cross section. Move the transducer to the left in parallel steps. As you saw before, vision is increasingly degraded by gas as you scan into the left upper abdomen. Nevertheless, try to make out the shape of the pancreatic tail. As you noticed in the previous series of upper abdominal transverse scans (which gave longitudinal views of the pancreas), the thickness of the organ increases in the tail region (Fig. 7.11b).
Now return to the aorta and scan past it toward the right side. Notice that, while the portion of the pancreas over the aorta is flat but is still broad craniocaudally, as you move to the right the cross section of the pancreas thickens considerably, showing that you have reached the head (Fig. 7.11c).
Repeat this tail-to-head pass several times. Gain a clear spatial impression of the anatomy and location of the pancreas by observing how its cross section changes with transducer position (Fig. 7.12).
Scanning the tail of the pancreas through the spleen
This approach is described fully in the section on Anatomical Relationships (p .150).
Variable shape of the pancreas
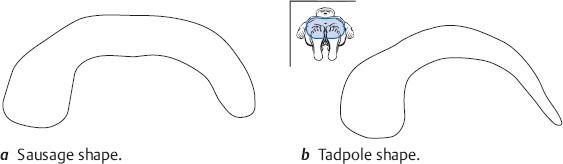
The shape of the pancreas is variable. Typically it resembles a dumbbell. Sausage and tadpole shapes are also seen (Fig. 7.13).
 Organ Details
KEY POINT
The parenchyma of the pancreas in young, slender individuals has about the same echogenicity as the liver parenchyma.
LEARNING GOALS
 Evaluate the echo pattern of the pancreas.
 Identify the pancreatic duct.
 Identify the common bile duct.
 Determine the size of the pancreas.
The pancreas is very rich in parenchyma (pancreas = “all flesh”) and has few definable internal structures. The pancreatic duct runs longitudinally through the parenchyma from tail to head, turning downward and backward at the head before joining the common bile duct and opening into the duodenum (Fig. 7.14). Ultrasound cannot define the side branches of the duct or an accessory pancreatic duct, if present.
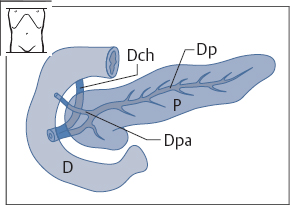
Fig. 7.14 Gross anatomy of the pancreas. D = duodenum, P = pancreas, Dch = common bile duct, Dp = pancreatic duct, Dpa = accessory pancreatic duct.
Pancreatic parenchyma
The parenchyma in young, slender individuals has a uniform, granular echo texture with approximately the same reflectivity as the liver (Fig. 7.15). Its echogenicity is variable, however. It is lower in slender individuals and often increases markedly with ageing and with weight gain (Figs. 7.16, 7.17). The pancreas then appears as a bright streak lying superficial to the dark splenic vein.
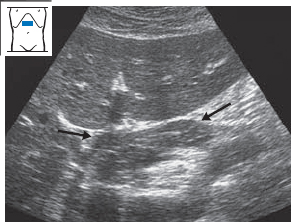
Fig. 7.15 Normal pancreas (→←). Normal pancreatic tissue has about the same echogenicity as the liver.
Abnormalities of the pancreatic parenchyma
Fibrolipomatosis. The most common abnormal finding is a homogeneous increase in parenchymal echogenicity due to fatty infiltration in obesity (Figs. 7.18, 7.19). This condition requires differentiation from a coarse “salt-and-pepper” pattern, which is a normal variant (Fig. 7.20).
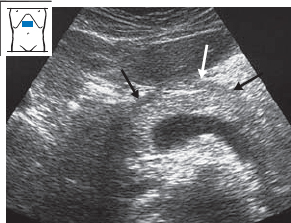
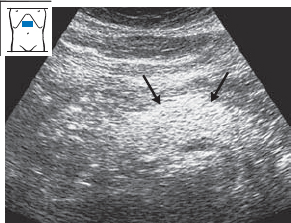
Fig. 7.19 Pancreatic lipomatosis due to alcohol abuse (↓↓). This patient had no known pancreatic disease.
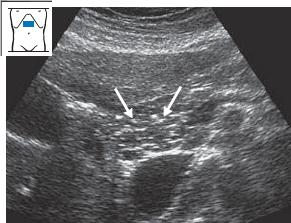
Chronic pancreatitis. Chronic pancreatitis is characterized by a coarse, heterogeneous echo pattern of increased density. The changes may be relatively minor (Fig. 7.21) or may present as coarse calcifications (Figs. 7.22, 7.23). The ultrasound features of chronic pancreatitis are listed in Table 7.1.
| Enlargement of the pancreas |
| Internal structure coarse and heterogeneous |
| Calcifications |
| Pseudocysts |
| Pancreatic duct dilated |
| Indistinct contours |
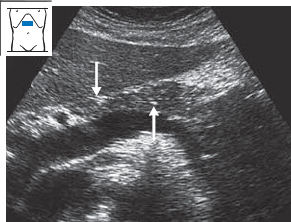
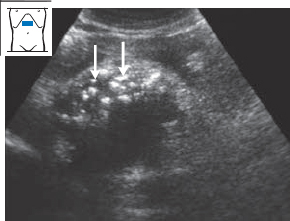
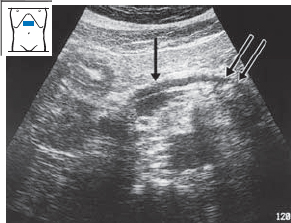
Fig. 7.23 Chronic pancreatitis. Calcifications are visible in the tail of the pancreas (↓↓). The parenchyma is thinned and the duct is dilated (↓).
Acute pancreatitis. Acute pancreatitis leads to homogeneous, hypoechoic swelling of the organ (Figs. 7.24, 7.25). The swelling may be circumscribed or may involve the entire pancreas. There may also be areas of intrapancreatic hemorrhage and necrosis leading to circumscribed, echo-free lesions. Table 7.2 reviews the sonographic features of acute pancreatitis. Table 7.3
Related posts:
Stay updated, free articles. Join our Telegram channel

Full access? Get Clinical Tree


