Finger Anatomy and Techniques
Introduction
Position 1: Base of Thumb
Technique
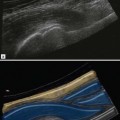
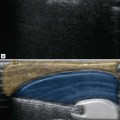
The basal joint of the thumb or the first CMCJ is best examined with the patient seated opposite and placing the ulnar aspect of their hand against the examination couch (karate chop position) (Fig. 14.1). The probe is placed in the sagittal plane aligned along the long axis of the thumb. The first metacarpal is distinguished from the much shorter tripezium and, from this landmark, the CMCJ is easily found. The tripezium separates the CMCJ from the adjacent scaphoid and scaphotrapeziotrapezoid joint in between. Degenerative changes in these two joints are a common cause of radial-side symptoms. Both are visualized from the sagittal probe position described above and can be injected together, or separately, as symptoms and ultrasound findings dictate.
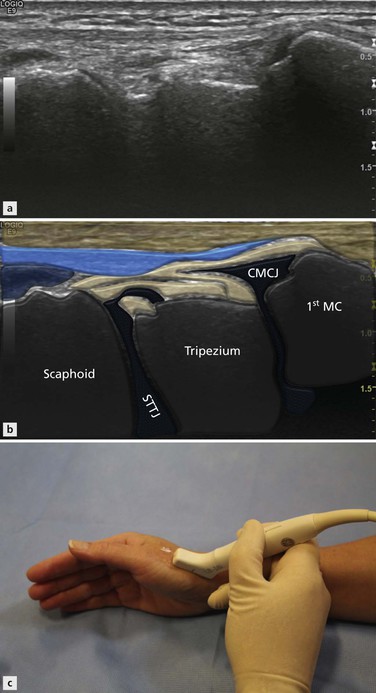
Figure 14.1 Karate Chop position to examine the CMCJ and STTJ. To examine both sides, the hands are placed in a praying position.
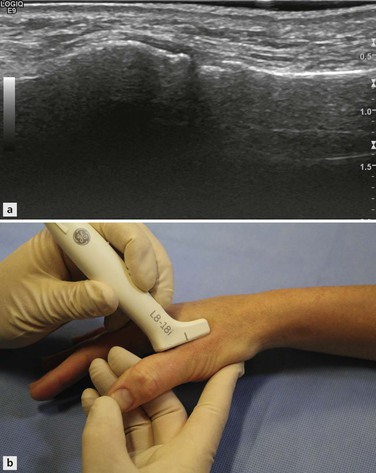
The UCL is best examined by asking the patient to place their hand palm downwards on the examination couch. For an examination of the right hand, the examiner sits opposite and places the probe in their left hand and takes the painful thumb in their right hand, raising the thumb and hand off the table slightly. The patient’s first proximal phalanx rests on the examiner’s middle finger in a position that allows the interphalangeal joint to be moved by the examiner’s thumb. The examiner’s index finger is placed on the ulnar side of the patient’s first metacarpal (Fig. 14.2). In this position the examiner can use their thumb to gently flex the interphalangeal joint and can use their index finger and thumb combined to induce valgus stress in the UCL.


Stay updated, free articles. Join our Telegram channel

Full access? Get Clinical Tree


