Reading X-ray images can feel scary at first. Students often wonder how to sort through those black-and-white films to spot key clues. For those who need extra help when studying, one option is to check out speedy paper writing services for quick guidance on writing tasks and summaries. Yet, it also helps to learn the basics of X-ray reading to gain belief in medical studies. This start will highlight key materials and best methods, offering a friendly approach for beginners. By seeing the steps needed to read X-ray images, students can spot unusual findings, such as fractures or strange patterns, and know when to seek more skilled help. Many times, building these skills calls for patience and practice. Yet, with the right facts, even a new learner can pick up clear review methods. The aim is to break down the task into easy steps anyone can follow. That way, they can better grasp a patient’s issue and make good choices.
Understanding X-Ray Basics
X-ray images form when a small dose of radiation passes through the body, capturing a picture of bones, tissues, and organs. Hard items, like bone, look white, while softer tissues appear in shades of gray. Air-filled areas, such as the lungs, look darker. Students should grasp these basics before diving deeper. With X-rays, the aim is to spot normal shapes, including bone alignment and lung fields, then compare them with any odd shapes or densities. Knowing how body parts appear in these images is key. Different areas, like the chest or arms, may need different views for a clear look. For instance, a chest X-ray often has a front view and a side view. Knowing these standard angles keeps students from confusion. Though skill comes from practice, starting with the core facts builds a strong base. Steady practice leads to comfort and grows watching skills over time. That process makes images easier to read. This helps learners read X-rays accurately.
Identifying Normal vs. Abnormal Findings
Finding what is normal versus strange gets easier with practice. First, students should study many X-ray examples that show healthy parts. By doing so, they learn the usual look of bones, joints, and organs. Then, odd findings stand out faster. For example, a break in a bone may show as a jagged line. Soft tissue swelling could appear cloudy. In the chest, fluid buildup might form a fuzzy boundary near the lung. Spotting these changes takes a careful check of every corner on the film. It also helps to see if both sides look alike. If one side appears off, there could be a problem. Students can track notes on typical shapes, like how the ribs line up or how the heart fits in the chest. Over time, noticing items that do not fit gets more natural. This step-by-step approach helps sharpen the mind and boosts reading speed. Patience and observation are vital in seeing minor cracks or hidden changes.
Tips for Reading Different X-Ray Views
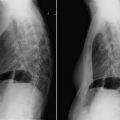
Different angles can highlight key details. For a chest X-ray, the most usual viewpoints are the back-to-front and side views. The back-to-front view shows the chest from the rear, giving a broad look at the lungs and heart. The side view, taken from the flank, helps reveal hidden zones, like behind the heart or low lung parts. For arms or legs, more angles may help check bone alignment or joint spacing. Students who learn the reason for each view gain a fuller idea of the body’s design. When reading these films, it helps to follow a steady plan. Some move from the edges inward, while others scan top to bottom. Both methods work if used with care. Always confirm the film label to see which side is shown. That avoids mixing up right and left. Staying alert to these steps can stop simple mistakes. Clarity leads to accuracy and builds trust in reading results. This practice raises overall reading skill.
Common Mistakes and How to Avoid Them
A big mistake is hurrying through an X-ray without an organized plan. Students might glance at the main spot and skip subtle signs near the margins. Taking time to look at each zone is key. Another error is not comparing both sides. For arms, see if the left and right bones appear the same. For the lungs, check if both sides share a similar shape. It is also easy to mix up patient position. Confirm which side is labeled on the film to avoid flipping it. Relying too much on memory can be risky. Write down notes or use a list for each part of the image. Sometimes, an X-ray may seem normal at first but show a break on closer review. Students should ask a teacher or classmate for a second look if unsure. Working together can stop small slips. An orderly, step-by-step habit helps lower these blunders. Confidence grows by spotting details over time. Practice leads to mastery.
Related posts:


Stay updated, free articles. Join our Telegram channel

Full access? Get Clinical Tree


