Fig. 4.1
(a) Axial view of the carpal tunnel. (b) Orange oval, flexor carpi radialis; purple oval, palmaris longus; yellow oval, median nerve; FPL flexor pollicis longus; D and S indicate the combined eight tendons of the flexor superficialis and digitorum muscles; arrow with stop indicates ulnar artery; and dotted green line, flexor retinaculum
Injection Techniques: In-Plane Axial Ulnar-Sided Approach [8]
Patient positioning: Sit the patient with the affected arm resting comfortably on the table. A towel can be placed underneath the wrist to create mild extension.
Probe position: The transducer is placed short axis (transverse) to the median nerve at the wrist. Scan proximally and distally until the nerve is clearly identified under the transverse carpal ligament, at approximately the level of the pisiform (Fig. 4.2a).
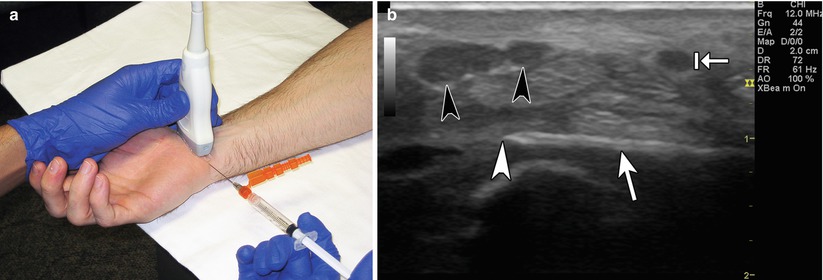

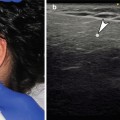
Fig. 4.2
(a) Example of probe position over carpal tunnel with ulnar-sided injection technique. (b) Example of in-plane approach. Black arrowheads point to bifid median nerve. White arrowhead points to needle tip. White arrow points to needle. Arrow with stop indicates ulnar artery
Markings: Because of the shallow needle plane angle, make sure to identify and mark off the ulnar nerve and artery and insert the needle just radial or deep to these structures.
Needle position: The needle should be inserted on the ulnar side of the wrist crease parallel to the transducer for optimal needle visualization. Some practitioners attempt to get as close to the nerve as possible, while others argue that because the carpal tunnel is a confined space, placing the injectate anywhere in the tunnel may be effective. There are no studies comparing these approaches. Some practitioners hydrodissect the nerve off of the flexor retinaculum or flexor tendons if adhesions are present.
Injection Techniques: Out-of-Plane Axial Approach [9]
Patient positioning: Sit the patient with the affected arm resting comfortably on the table. A towel can be placed underneath the wrist to create mild extension.
Probe positioning: The transducer is placed axially to the median nerve at the wrist. Center the probe over the median nerve (Fig. 4.3a).


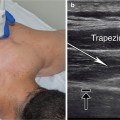
Fig. 4.3
(a) Example of probe position over carpal tunnel. (b) Example of out-of-plane approach. White arrowhead points to needle tip. Black arrow points to median nerve. Green dotted line represents flexor retinaculum
Markings: Mark any obvious vessel or tendon prior to injection.
Needle position: The needle should be inserted at a steep angle at the center of the ultrasound probe, directed just adjacent to the median nerve. The needle tip is seen as a bright hyperechoic dot. The injectate is delivered next to the nerve. Hydrodissection is not performed with this technique since the whole needle path cannot be visualized.
Safety considerations: The palmar cutaneous branch of the median nerve arises just proximal to the flexor retinaculum and is a potential site for injury using a radial-sided approach; therefore, the ulnar approach is recommended. The palmar cutaneous branch of the ulnar nerve travels superficial to the flexor retinaculum and is a potential site for injury with the in-plane ulnar-sided approach [10]. The median nerve is very superficial therefore the in-plane approach is preferred to maximize visualization and avoid nerve injury. Patients may have hand numbness for the duration of the local anesthetic and should not plan on driving after the procedure.
Pearls:
The median nerve is subject to anisotropy but not as much as the surrounding tendons. Nerve visualization can be improved by flexing and extending the fingers or wrist or by toggling the probe in the axial plane.
Tracking the nerve proximally into the forearm may help differentiate it from the palmaris longus tendon.
An oblique standoff technique may be helpful for small wrists.
Doppler mode can help identify vascular structures such as a persistent median artery [11].
Equipment needed:
High-frequency linear array transducer (10 MHz+)
25G 1.5″ needle
0.5 mL of steroid preparation
1–3 mL local anesthetic
Distal Radioulnar Joint (DRUJ)
Although uncommon, the distal radioulnar joint (DRUJ) can be a source of ulnar-sided wrist pain [12]. The DRUJ allows for forearm supination and pronation and stabilizes the wrist. DRUJ pain typically comes from arthritis [13]. Presenting symptoms may include pain and weakness. Injections to confirm DRUJ pain were typically performed with fluoroscopy. Ultrasound guidance enables the effective placement of a needle into this small joint space with uneven anatomy (Table 4.1).
Table 4.1
Accuracy of ultrasound guided DRUJ injections
Study – DRUJ | Author | Accuracy (%) |
|---|---|---|
Ultrasound guided | Smith et al. [35] | 100 |
Scanning Technique and Anatomy to Identify
The patient should sit with the elbow in slight flexion and the forearm pronated so that the hand rests comfortably. The DRUJ lies deep to the fourth and fifth extensor compartments of the dorsal wrist. The transducer is placed transversely, short axis to the fourth and fifth extensor compartments over Lister’s tubercle and the distal ulna. Identify the extensor digiti minimi (EDM) muscle which lies over the DRUJ (Fig. 4.4) [14, 15].


Fig. 4.4
(a) Axial view over dorsal distal radioulnar joint. (b) Asterisk indicates DRUJ; purple circle, third extensor compartment (extensor pollicis longus); orange, fourth extensor compartment (extensor digitorum and extensor indicis); magenta circle, fifth extensor compartment (extensor digiti minimi); LT Lister’s tubercle; and ulnar head labeled
Injection Techniques: In-Plane Axial Approach [9]
Patient positioning: Sit the patient with the affected arm resting comfortably on a table with the wrist and hand in pronation, palm down.
Probe positioning: Place the transducer axially over the fourth and fifth extensor compartments at the wrist at the level of the ulnar styloid process and Lister’s tubercle (Fig. 4.5a).


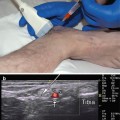
Fig. 4.5
(a) Example of probe position over DRUJ with gel standoff technique. (b) Example of in-plane approach. White arrowhead points to needle tip. White arrow points to needle. Gel-gel standoff, radius, and ulna labeled
Markings: It may helpful to identify the ulnar styloid process and Lister’s tubercle for bony anatomy and transducer placement and then the fifth extensor compartment to avoid needle placement into the EDM.
Needle position: The needle should be inserted on the ulnar side of the EDM parallel to the transducer for optimal needle visualization. The needle should be inserted deep to the EDM and aimed at the DRUJ recess between the ulna and radius.
Safety considerations: Prior to passing the needle below the extensor digiti minimi tendon, Doppler may help to identify the dorsal branch of the anterior interosseous artery which runs in a neurovascular bundle with transverse branches of the dorsal ulnar cutaneous nerve [12, 16].
Pearls:
An oblique standoff technique may be used if the ulnar styloid process makes an appropriate needle angle difficult to attain.
Doppler mode may help identify vascular structures.
Extending the fingers may help improve identification of local anatomy.
Equipment needed:
High-frequency linear array transducer (10 MHz+)
25G 1.5″ needle
0.5 mL of steroid preparation
1–3 mL local anesthetic
First Extensor Compartment
DeQuervain’s disease is a painful tenosynovitis of the abductor pollicis longus (APL) and extensor pollicis brevis (EPB) tendons in the first dorsal extensor compartment of the wrist. DeQuervain’s disease is thought to occur from overuse or trauma directly to the tendon sheath [17]. Symptoms include hand, wrist, and thumb pain with activities that involve abduction and extension of the thumb. Provocative tests such as Finkelstein’s maneuver may reproduce symptoms. The diagnosis is based on history and physical exam. Corticosteroid injection has been shown to provide improvement in pain and function (Table 4.2) [15, 18, 19].
Table 4.2
Relief following ultrasound guided 1st dorsal compartment injection
Study – 1st dorsal compartment | Author | Symptomatic relief at follow-up (%) |
|---|---|---|
Ultrasound guided | Jeyapalan et al. [36] | 94 |
Scanning Technique and Anatomy to Identify
The patient should sit with the elbow flexed and the wrist and hand in neutral position so that the radial styloid is facing up. The first extensor compartment is located directly over the radial styloid process. The transducer is placed transversely, short axis over the radial styloid. The APL and EPB tendons travel through this compartment and can be separated by a septum. The APL lies more volar than the EPB. Scanning further distally will show the two tendons diverging towards their insertions. Scanning proximally will show them side by side. The compartment is covered by an extensor retinaculum. Tendon sheath thickening may be apparent with transverse or longitudinal scanning; a “donut sign” may indicate synovitis (Fig. 4.6) [20, 21].
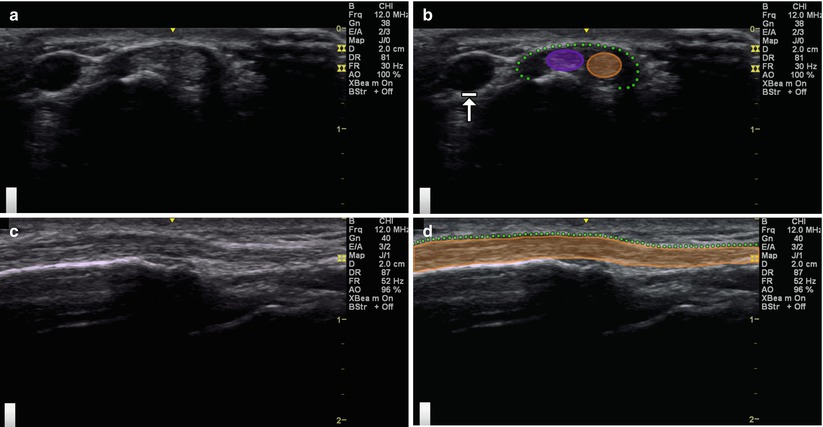

Fig. 4.6
(a) Axial view over first extensor compartment. (b) Purple circle, abductor pollicis longus; orange circle, extensor pollicis brevis; dotted green line, extensor retinaculum; arrow with stop indicates radial artery. (c) Longitudinal view over first extensor compartment. (d) Orange indicates abductor pollicis longus and extensor pollicis brevis; dotted green line, extensor retinaculum
Injection Techniques: In-Plane Longitudinal Approach
Patient positioning: Sit the patient with the affected arm resting comfortably on a table. Place the hand in a neutral position with the radial styloid facing up.
Probe positioning: Place the probe longitudinal over the radial styloid and APL tendon (Fig. 4.7a).
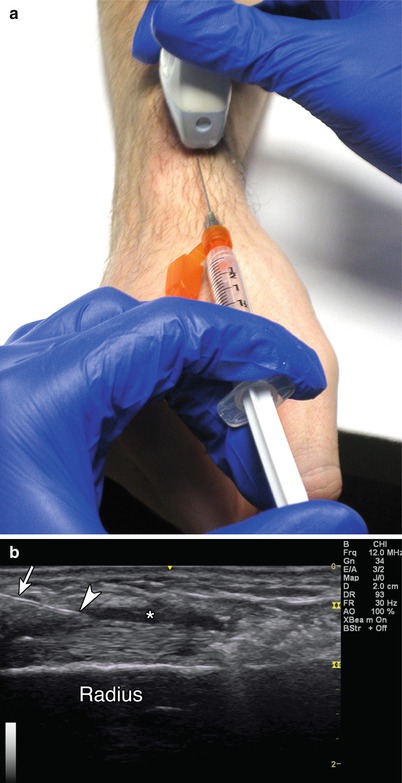

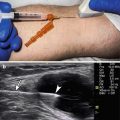
Fig. 4.7
(a) Example of longitudinal probe position over first extensor compartment. (b) Example of in-plane approach. White arrowhead points to needle tip. White arrow points to needle. Asterisk indicates injectate filling tendon sheath. Radius labeled
Markings: Identify and mark any veins and the radial artery that lie volar to the 1st dorsal compartment.
Needle position: The needle should be inserted parallel to the transducer for optimal needle visualization. The needle tip target is the tendon sheath overlying the APL and EPB tendons.
Injection Techniques: Out-of-Plane Axial Approach
Patient positioning: The patient is seated with the affected arm resting comfortably on a table. Place the hand in a neutral position with the radial styloid facing up.
Probe positioning: Start by placing the transducer short axis (transverse) over the radial styloid and scan proximally and distally until the APL and EPB are clearly identified traveling in the same compartment (Fig. 4.8a).
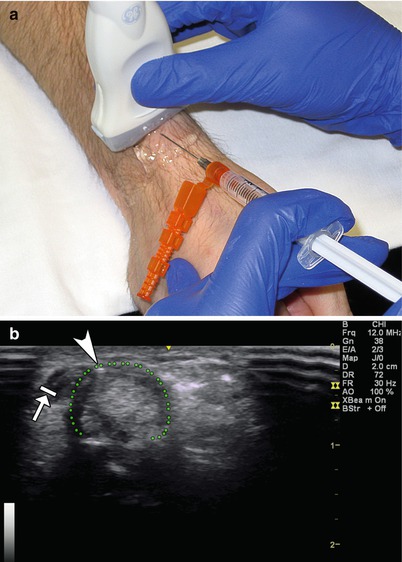

Fig. 4.8
(a) Example of transverse probe position over first extensor compartment. (b) Example of out-of-plane approach. White arrowhead points to needle tip. Dotted green line – tendon sheath. Arrow with stop indicates radial artery
Markings: Identify and mark any veins and the radial artery that lie volar to the 1st dorsal compartment.
Needle position: The needle should be inserted perpendicular to the transducer. Keep the needle tip superficial as the target site is the tendon sheath encasing the APL and EPB tendons.
Safety considerations: There is a risk of the following: prolonged bleeding, infection, tendon rupture, allergic reaction, increased pain, and decreased functional scores. If using corticosteroid, there is a risk of soft tissue (fat) atrophy and local depigmentation with corticosteroid injection.
Pearls:
The superficial branch of the radial nerve can lie over the first dorsal compartment and may be temporarily blocked by the local anesthetic.
The footprint of a standard probe is too large to fully cover a short axis view of the 1st dorsal compartment, and an oblique standoff technique may allow for better needle visualization.
Doppler mode may help identify vascular structures.
Equipment needed:
High-frequency linear array transducer (10 MHz+)
25G 1.5″ needle
0.5 mL of steroid preparation
1–3 mL local anesthetic
Scaphotrapeziotrapezoid (STT) Joint
The STT joint is located on the radial side of the wrist. STT joint pain is a common source of wrist pain; however, making an accurate diagnosis in this complex area of the wrist can be difficult [22]. The STT joint can produce pain on the dorsal or volar aspect of the wrist and mimic pain arising from the 1st carpometacarpal joint [23]. Patients often complain of deep achy arthritic-type pain. There are no specific provocative tests for STT joint pain; however, direct palpation of the volar STT joint should reproduce the pain [24, 25]. The diagnosis remains challenging with history and physical exam alone. Injection into the STT joint can provide symptomatic relief and serve as a diagnostic tool (Table 4.3).
Scanning Technique and Anatomy to Identify
The patient should sit with the elbow flexed and the hand lying comfortably in the supinated position. A high-frequency linear transducer is placed longitudinal to the distal radius. The hyperechoic bony radius is followed distally until the radioscaphoid articulation is identified. Continue scanning distally until the trapezium and carpometacarpal joint are identified. Moving the thumb can help to identify the CMC joint. The flexor carpi radialis tendon can be visualized superficial to the STT joint. Doppler can be used to help identify the superficial palmer branch of the radial artery (Fig. 4.9).


