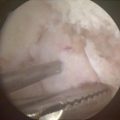
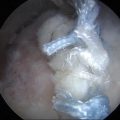
Fig. 2.1
Patient positioning using a well leg holder with the contralateral hip abducted and flexed and placed in a well-padded leg holder. The end of the table has been completely flexed out of the operative field. Also notice the placement of the arthroscopic tower and accessories on the contralateral side of the operative extremity
Every knee arthroscopic procedure can be performed with the patient supine on the operating room table. If additional lateral or medial posterior knee access is needed, a bump under the ipsilateral or contralateral hip, respectively, should be considered. If intraoperative fluoroscopy is planned, the patient will need to be moved to the distal end of the bed to accommodate a lateral radiograph. Proximal and distal patient positioning is also important if a well leg holder is used as the bed needs to break just proximal to the knee.
Depending on surgeon preference, a table attachment should be placed on the side rails to provide an immobile counterforce to improve visualization of knee compartments. An adjustable side post is commonly used and should be placed at a level that allows the leg to be abducted with sufficient room for the surgeon to stand inside the medial aspect of the leg. Conversely, a well leg holder can be used with the distal aspect of the table dropped and the contralateral hip abducted, flexed, and placed in a well-padded leg holder (Fig. 2.1). More involved procedures might require additional table attachments but must be placed with care to not block access to the knee during instrument passage. Most surgeons use a non-sterile tourniquet inflated to 250 mm of mercury which must be placed high enough on the operative thigh for adequate exposure of the knee.
Pertinent Knee Anatomy and Portal Location
Prior to choosing the appropriate portal location, the surgeon should draw out the pertinent knee anatomy using a sterile marking pen. These structures should be outlined with the knee in 60°–90° of flexion as this is how the knee will look when the incisions are made, and flexion tightens the overlying soft tissues and makes the underlying structures more prominent and easier to palpate. Knowledge of local neurovascular structures is imperative, especially for the more posterior portals. In general, the patella, patellar tendon, medial and lateral tibial joint lines, and medial and lateral femoral condyles are outlined with marker.
Primary Portals
The two primary portals, anterolateral and anteromedial, are the workhorse portals of knee arthroscopy (Fig. 2.2a–c). They do not place any significant neurovascular structures at risk, are easy to identify, and facilitate a wide variety of procedures: diagnostic arthroscopy, medial and lateral meniscectomies, shaving chondroplasty, most microfracture techniques, removal of loose bodies, and all-inside meniscal repair as well as many others. Most surgeons create 1 cm longitudinal incisions which allow for more superior-inferior mobility of instruments versus transverse incisions which allow for more medial-lateral instrument mobility.
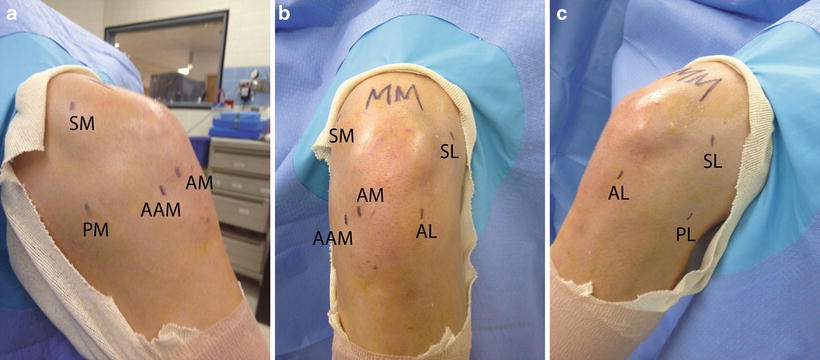

Fig. 2.2
(a)–(c) The locations of commonly used primary and secondary arthroscopic portals are drawn on the patient’s knee. AM anteromedial, AL anterolateral, AAM accessory anteromedial, SM superomedial, SL superolateral, PM posteromedial, PL posterolateral
Anterolateral Portal
Almost universally, the anterolateral portal is the first portal created and functions as the primary viewing portal. An incision is made distal to the inferior edge of the patella in line with the lateral border of the patella. As further reference, it should be just lateral to the patellar tendon and 1 cm superior to the tibial joint line. These landmarks should place the incision in a soft spot.
Anteromedial Portal
In almost all arthroscopic procedures, this is the second portal created and, unlike the anterolateral, is often made under direct visualization. The location is essentially a mirror image of the anterolateral flipped to the other side of the patellar tendon: 1 cm distal to the inferior border of the patella in line with the medial border of the patella, just medial to the patellar tendon, and it often falls 1 cm proximal to the medial tibial plateau. However, this basic location should be altered to accommodate the pathology. For a tear of the posterior horn of the medial meniscus, a biter and shaver must be able to slide under the medial femoral condyle which may require a slightly more inferior portal. Conversely, a lateral meniscus tear necessitates a slightly more superior portal in order to slide over the elevated tibial spines. This portal is initially localized with an 18 gauge spinal needle which can be advanced all the way into the involved compartment to determine if this portal location will permit the desired procedure. Then a #11 scalpel pierces the capsule, and a straight hemostat develops the path into the joint. Most arthroscopic instrumentation will be used through this portal.
Secondary Portals
The secondary portals listed below are not created for every knee arthroscopy but rather are used in particular circumstances when the primary portals do not provide adequate access (Fig. 2.2a–c).
Accessory Anteromedial Portal
With the advent of a more anatomic ACL reconstruction and a concurrent departure from transtibial technique, this portal was created to assist in localizing the entry point of the femoral tunnel [6]. Located medial and slightly inferior to the standard anteromedial portal, a spinal needle is inserted in the proposed location and should slide just anterior to the medial femoral condyle and come to rest in the location where the surgeon plans to drill the femoral ACL tunnel. With the knee in hyperflexion, this is the angle in which the tunnel will be drilled and the graft passed and secured. While passing instrumentation in and out of this portal, great care must be taken to avoid iatrogenic damage to the medial femoral condyle.
Posteromedial Portal
This portal is approximately 2½ cm distal and 2½ cm posterior to the medial epicondyle. With the knee flexed to 90°, this location is approximately 1–2 cm above the joint line. Utilizing the modified Gillquist maneuver or view, this and the posterolateral portals are more accurately localized. In this maneuver, the arthroscopic sheath and the blunt obturator are placed in the contralateral anterior portal and are slid along the ipsilateral condyle in the notch until it “pops” into the posterior knee. This can also be gently performed under direct visualization with the scope still in place, which may be a safer technique. Once the arthroscope is in the correct location, the overhead lights can be turned off so that the arthroscopic light will transilluminate the proposed portal location (Fig. 2.3a). Some surgeons recommend using a 70° scope for this maneuver. An additional benefit of transillumination is that overlying neurovascular structures can be visualized as dark lines running in a superior-inferior direction. An 18 gauge spinal needle assures the correct location (Fig. 2.3b, c), which is followed by the “nick and spread” method to avoid injuring the saphenous nerve and long saphenous vein [7]. McGinnis et al. found that the soft spots on the posteromedial aspect of the knee and 1 cm superior to this location were safe portals, but 1 cm inferior was always directly in the path of the saphenous nerve [8]. This portal provides access to posteromedial structures such as the posterior horn of the medial meniscus and the posterior cruciate ligament (PCL) [9].
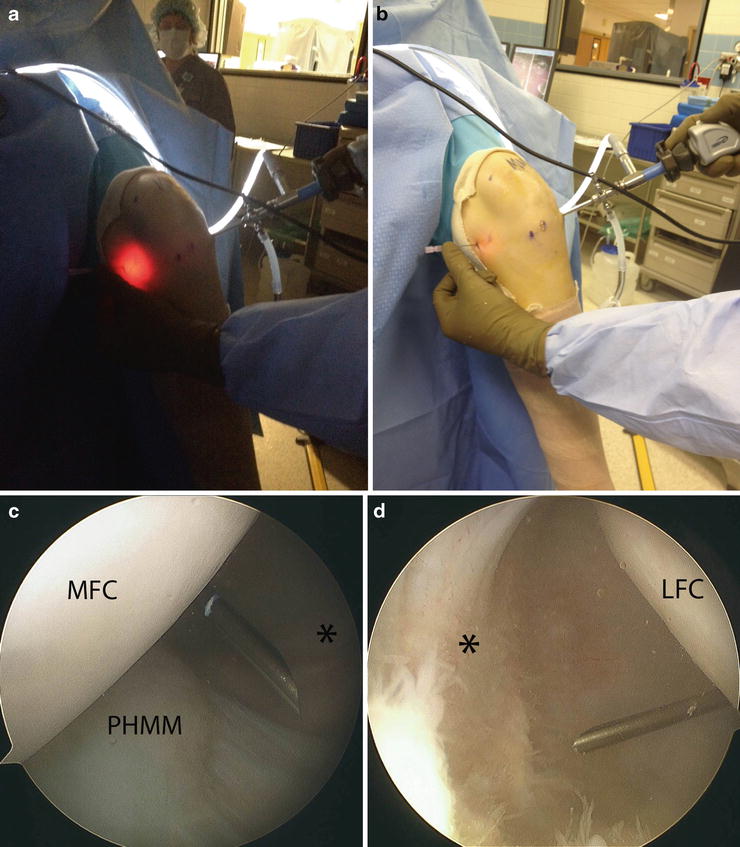

Fig. 2.3
(a) After performing the modified Gillquist maneuver to place the arthroscope in the posterior knee, the overhead lights are turned off so that the posteromedial portal location is transilluminated. (b) An 18 gauge spinal needle is placed at this location and confirmed arthroscopically. Note that the arthroscope is in the anterolateral portal. (c) In the posterior knee, the 18 gauge needle is seen very easily, and this trajectory can be used to address posteromedial pathology. (d) This same technique should also be used to establish the posterolateral portal, but the arthroscope is placed in the anteromedial portal. MFC medial femoral condyle, LFC lateral femoral condyle, PHMM posterior horn of the medial meniscus, Asterisk posterior knee capsule
Posterolateral Portal
As a general rule of thumb, this portal is located just anterior to the biceps tendon (thus anterior to the common peroneal nerve) and just posterior to the iliotibial (IT) band. As described above, the Gillquist maneuver with a spinal needle allows for accurate localization of this portal with the knee in flexion [7] (Fig. 2.3d). In 90° of flexion in a cadaveric model, the common peroneal nerve was noted to travel approximately 25 mm posterior to the portal location, compared to 20 mm with the knee in extension [10].
Stay updated, free articles. Join our Telegram channel

Full access? Get Clinical Tree


