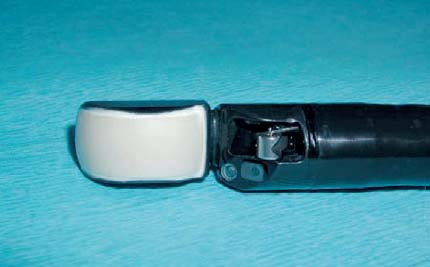
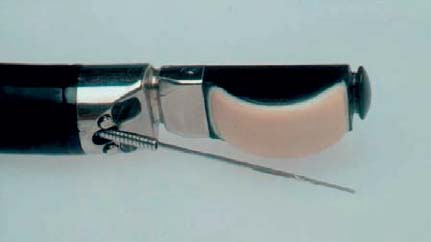
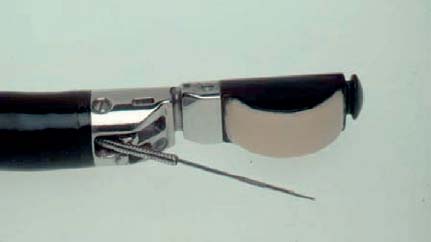
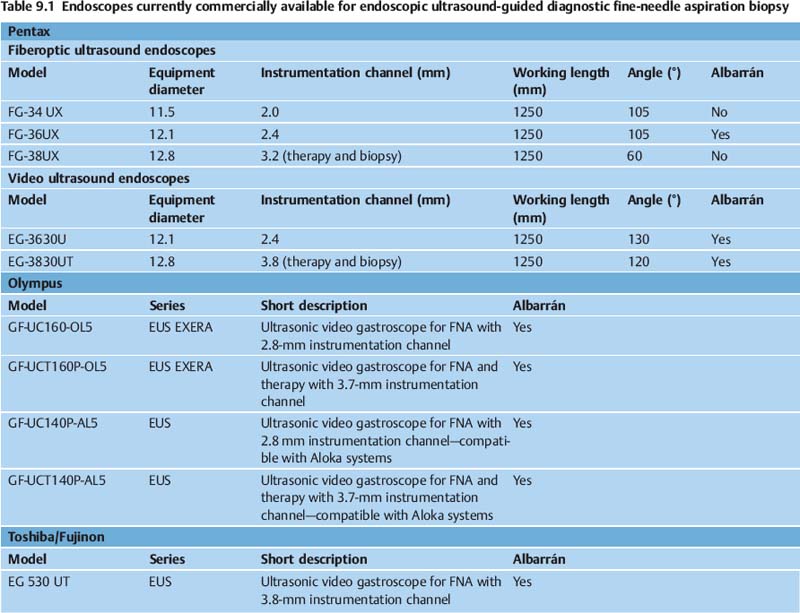
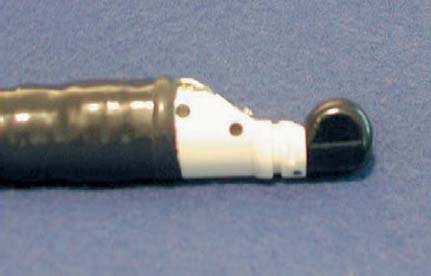
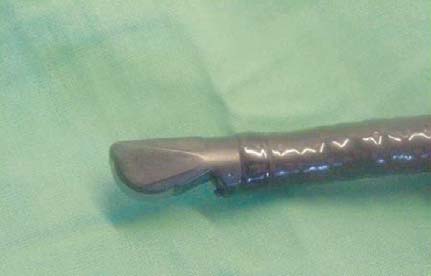
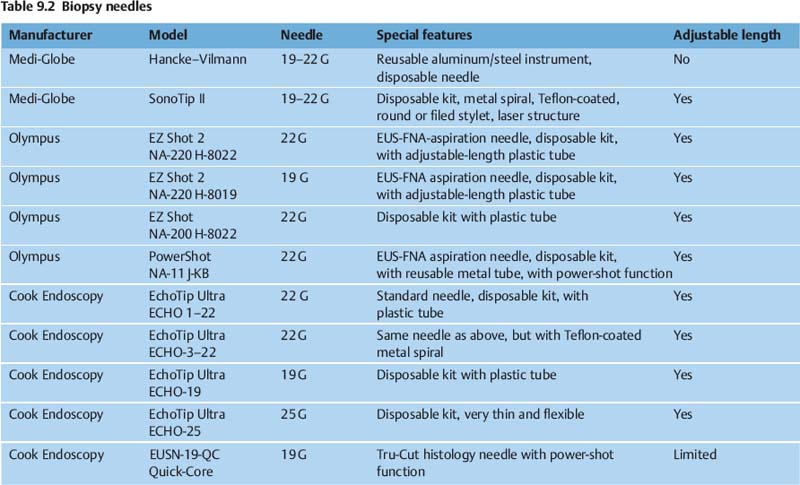
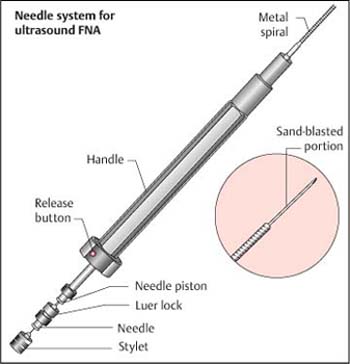
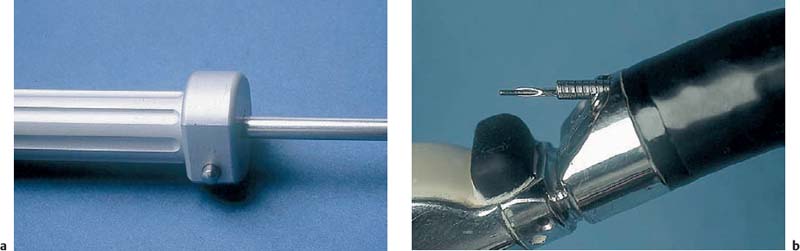
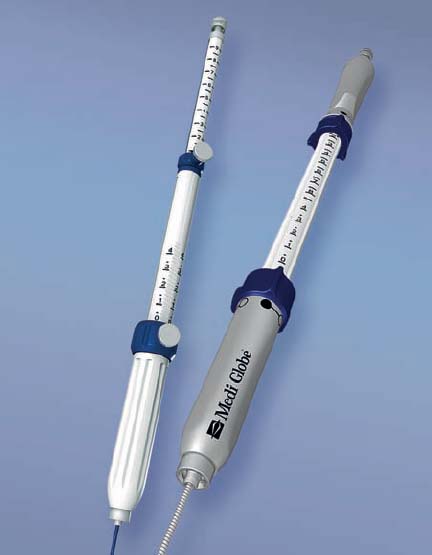
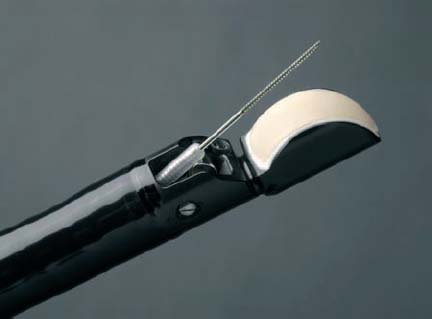
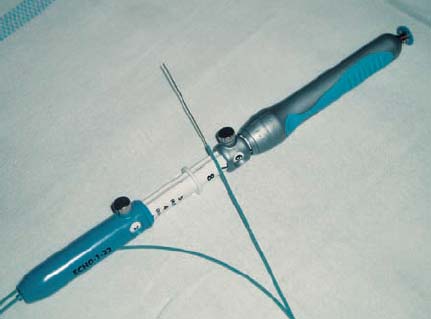
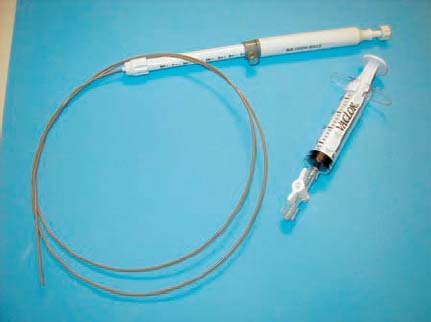
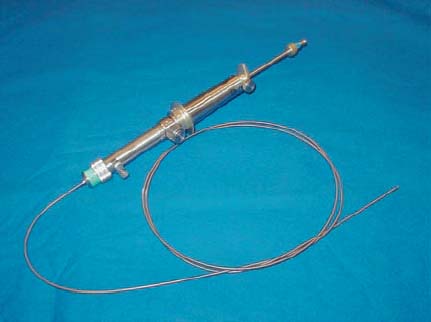
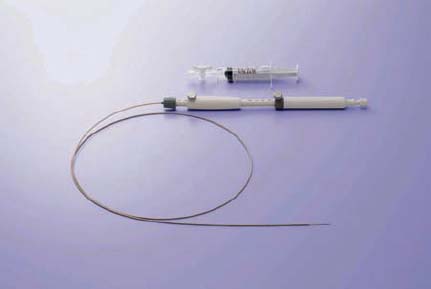
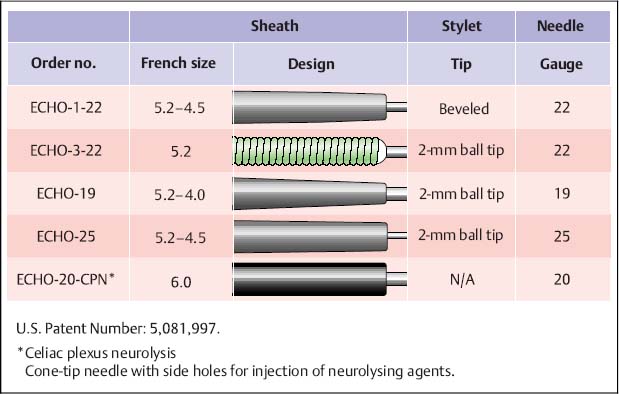
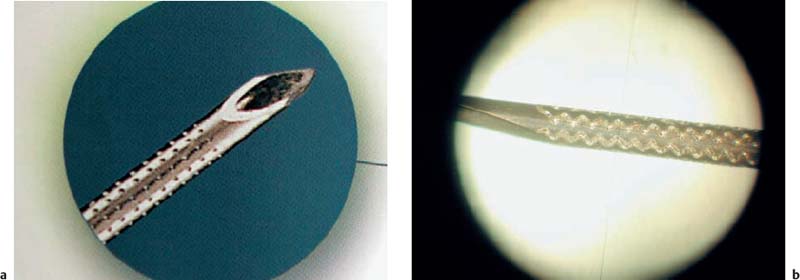
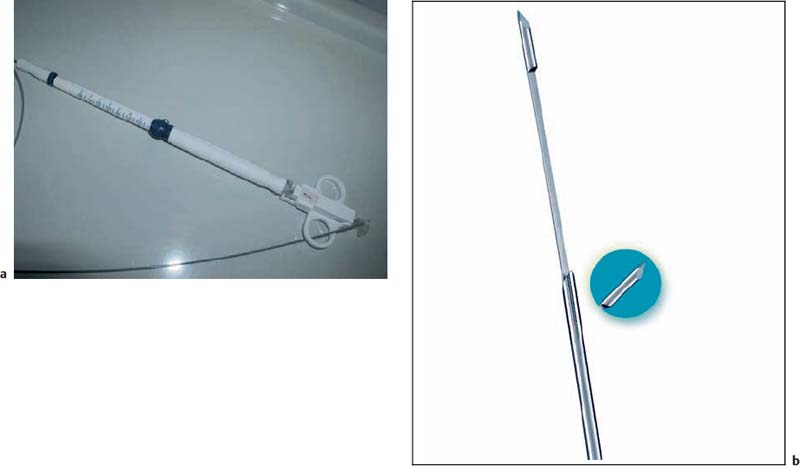
9 EUS-Guided Biopsy: Equipment and Technique The development of endoscopic ultrasound scanning (EUS) began in the early 1980s with mechanical, radialscanning transducers.1–3 Despite excellent imaging resolution, the method did not gain widespread popularity until the development of EUS-guided fine-needle aspiration (EUS-FNA) biopsy.4–8 For many years, efforts to characterize specific lesions and differentiate between them using EUS imaging alone postponed the necessary development of tissue sampling guided by endosonography. EUS-FNA is now performed routinely at many endoscopic centers, and the procedure is clearly having a major impact on the therapeutic management of patients by providing definitive tissue diagnosis of lesions outlined by endosonography. EUS-FNA is obviously by no means limited to the field of gastroenterology, since the gastrointestinal tract traverses through anatomical regions related to other medical specialties such as pulmonology, thoracic surgery, internal medicine, oncology, urology, gynecology, and endocrinology.9–11 There is also considerable evidence that EUS-FNA in experienced hands can replace many other far more invasive and risky diagnostic procedures, such as mediastinoscopy, diagnostic laparoscopy, and even laparotomy or thoracotomy.12–14 Fig. 9.1 Pentax EG-3830UT Fig. 9.2 Pentax FG-34UX One of the main strengths of EUS-FNA in comparison with radiographic imaging methods with percutaneous biopsy is the close proximity of the transducer to the regions of interest. This means that even minute lesions, down to a size of 5 mm, can be imaged and consequently biopsied. However, the technique is not easy to master, and considerable energy and effort need to be invested before an examiner’s technique reaches an acceptable success rate comparable to that reported in the literature, at ≈ 90–95%, with an overall sensitivity and specificity of 90% and 100%, respectively. The aim of the present chapter is to describe the technique of EUS-guided biopsy in detail, based on a literature review and our extensive experience with this method. Table 9.1 and Figs. 9.1, 9.2, 9.3, 9.4, 9.5 show the endoscopes that are currently commercially available for EUS-guided diagnostic fine-needle biopsy. Some of these devices have an Albarran lever (elevator) to facilitate needle positioning. Several aspects need to be taken into consideration when one is choosing a biopsy instrument, including the Albarran, the stiffness/flexibility and length of the distal part of the endoscope, the diameter of the distal end of the endoscope, the diameter of the working channel, and last but not least the quality of the ultrasound image. The final decision needs to be based on a compromise between these options. Fig. 9.3 Pentax FG-36UX Fig. 9.4 Olympus GF-UC140P-AL5 Fig. 9.5 Fujinon PEF-708FA In the early 1990s, special biopsy equipment was developed by one of the present authors (P.V.) and Søren Hancke in collaboration with the German accessory company GIP-Medizintechnik (now Medi-Globe), leading to the final breakthrough for the EUS-guided biopsy method.15 A wide range of different needle systems is now available (Table 9.2). All of the other biopsy equipment for EUS-FNA that is currently available on the market is based on the same construction principles, so that the EUS-FNA procedure can be explained on the basis of the original design of the Hancke-Vilmann needle system. The core of the biopsy instrument is a stiff steel needle 170 cm long. The needle is manipulated using a handle piston inside the biopsy handle (or outside it with the Olympus and Wilson-Cook systems) (Fig. 9.6). The handle piston with the needle transmits any movements made by the examiner directly to the needle tip without compressing the needle, so that it can even be used to penetrate hard tumors. The handle piston can be locked and unlocked by means of a button (or screw) to avoid advancement of the needle during introduction and withdrawal of the biopsy assembly (Fig. 9.7). Fig. 9.6 The Hancke-Vilmann multiple-use needle system (Medi-Globe). The needle is supported by a stable metal spiral sheath, which is firmly connected to the aluminum handle. The handle can be firmly connected to the endoscope using a Luer lock. When the handle is screwed onto the endoscope’s Luer connection, the metal spiral extends 4–5 mm out of the distal outlet of the working channel, so that the needle cannot damage the endoscope’s instrument channel as it is being introduced. Inside the needle, there is a stylet with the important feature (in the original version) of having a rounded tip, to avoid perforating the spiral and damaging the endoscope’s working channel, requiring very expensive repairs. Nowadays the needle is also available with an optional beveled stylet (Fig. 9.8). The instruments described above represent the conventional biopsy equipment developed by Vilmann and Hancke. In these instruments, the steel needle is disposable, while the other components can be reused several times. Due to the variety of customer requirements, Medi Globe, Olympus, and Wilson-Cook have developed single-use plastic kits that can be disposed of completely (Figs. 9.9, 9.10, 9.11, 9.12). These innovations also make it possible to adjust the length of the needle sheaths to match the variable lengths of the endoscope working channels. However, many examiners still use the conventional biopsy equipment, which with its purely metal components provides a high degree of stability and guide precision, as this can be advantageous for biopsies of hard tumors. In addition to the aspiration needle equipment, the disposable kits also contain a syringe with a three-way stopcock that makes handling easier. An automatic spring-loaded biopsy system (Olympus Power Shot; Fig. 9.13) is also available; this has a metal spring that can forcefully shoot the needle out up to 3 cm (the depth is adjustable). Fig. 9.7a, b a When the needle is completely retracted inside the sheath, the position can be fixed with a button to avoid accidental forward movement of the needle tip. b The stylet is unprotected when the needle piston is unlocked. This may cause damage to the working channel during introduction of the needle assembly. Fig. 9.8a, b Stylets can either be round (a) or beveled (b) at the distal end of the needle. Fig. 9.9 The SonoTip II and SonoTip ProControl single-use system (by Medi-Globe). There is a wide range of different sheath designs, either consisting of metal rings with or without Teflon coating, or sheaths made entirely of Teflon or other plastic types (Figs. 9.14 and 9.15). Different sizes of sheath diameter are available; the larger sheath diameter sizes (Medi-Globe) are preferable for biopsies using large-channel endoscopes. The sheath diameters available from Medi-Globe are either 1.8 mm or 2.7 mm. To increase the visibility of the needle during EUS-FNA, the various manufacturers each have specific designs for the distal few centimeters of the needle tip, with different laser-produced marks in the metal (Fig. 9.16). In the authors’ experience, there are no major differences between the various designs with regard to needle monitoring and visualization, but there are variations in the way they appear on the ultrasound image. Only one histological Tru-Cut needle with a spring-loaded shot mechanism is currently available (the Quick-Core needle from Wilson-Cook) (Fig. 9.17). Fig. 9.10 Needle with reinforced metal sheath. Fig. 9.11 Echo-Tip single-use system (Wilson-Cook). Fig. 9.12 EZ shot single-use system (Olympus). Fig. 9.13 Power Shot reusable spring-loaded needle system (Olympus). Fig. 9.14 Olympus EZshot2 (adjustable length). Fig. 9.15 Different needle types and sheath designs (Wilson-Cook). Fig. 9.16a, b Different laser-treated needle tips for enhanced ultrasonic needle visualization. Fig. 9.17a, b The Quick-Core spring-loaded histological Tru-Cut needle (Wilson-Cook). Due to the lengths of the instrument and other required equipment, the examination room should be sufficiently large. The stiff 170-cm needle has a high level of residual stress, so that carelessness in small rooms can result in injury to medical staff. Priority should be given to ensuring that there is sufficient space to place the endoscope, with a working surface nearby for the smear preparation. The biopsy instrument should be used with sterile gloves as far as possible, to avoid iatrogenic infections with hospital germs.

Related posts:
Stay updated, free articles. Join our Telegram channel

Full access? Get Clinical Tree


