Fig. 70.1
Equipment required for placement of PEG tube
It is mandatory that the endoscopist performs a complete OGD and excludes any of the contraindications mentioned above. Wolfsen et al. reported that during initial endoscopy for a scheduled PEG procedure, 36% of the patients had findings such as gastric outlet obstruction or peptic ulcer disease that led to changed management of the patients or abandonment of the procedure altogether. During this time, the assistant cleans the abdomen of the patient with disinfectant (iodine or chlorhexidine) and covers it in a sterile fashion.
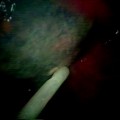
The usual point of insertion is the left upper quadrant, a few centimetres left of the midline below the inferior margin of the ribs. The endoscopist identifies a position in the anterior wall of the stomach, usually at the junction of antrum and corpus, for the placement of the PEG tube. The lights in the endoscopy room are then dimmed, and the light at the end of the gastroscope should be visible through the abdominal wall (gastric transillumination). The assistant now pushes his/her finger against the abdominal wall from the outside to confirm the site of puncture endoscopically (Fig. 70.2).
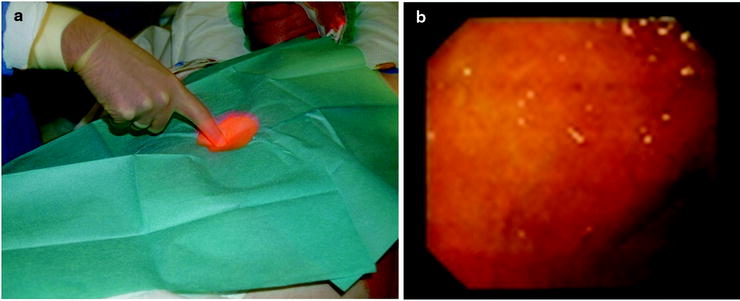

Fig. 70.2
Abdominal transillumination and finger pushing visible endoscopically external (a) and internal (b) view
When the correct site is identified, local anaesthetic is infiltrated into the skin and the abdominal wall. At an angle of 90 °, the infiltration needle is advanced further, and the wall of the stomach is punctured taking care not to damage the gastroscope. The needle needs to be advanced until air is aspirated and the needle is visible via the gastroscope in the stomach (Fig. 70.3).
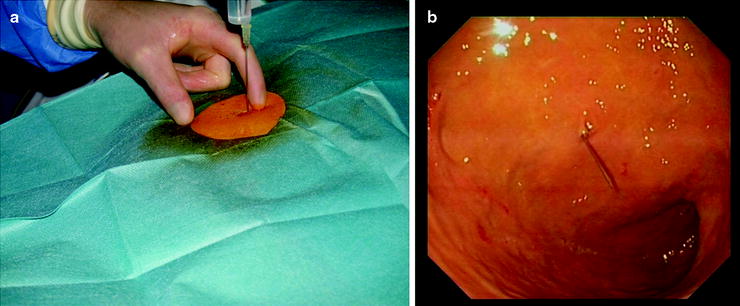

Fig. 70.3
Local anaesthetic infiltration and advancement of needle into stomach, external (a) and internal (b) view
The needle is then removed, and a small incision is made with the scalpel at the site (approx. 5 mm). Now, the puncture needle is advanced, and when inside the stomach, the stylet is removed (Fig. 70.4).
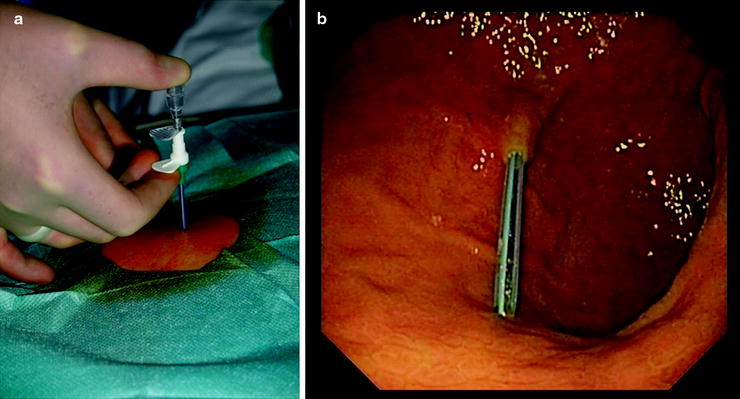

Fig. 70.4
The puncture needle is advanced with stylet, external (a) and internal (b) view
Remember to cover the end of the needle briefly with your finger to avoid air escaping which makes gastroscopy more difficult. After removing the stylet, the double string is passed through the sheath into the stomach. At the same time, the endoscopist passes a forceps through the working channel of the gastroscope and grabs the string (Fig. 70.5).
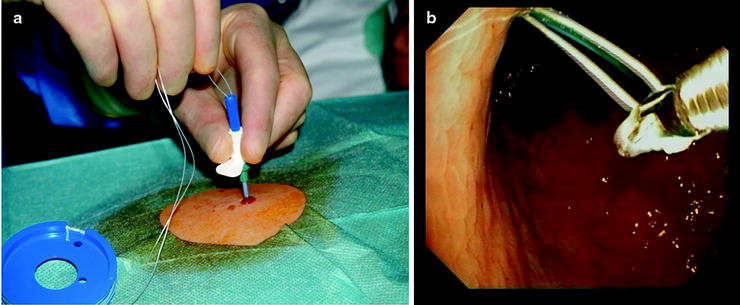

Fig. 70.5
Passing the string through the sheath and grabbing it with biopsy forceps inside the stomach, external (a) and internal (b) view
The forceps are now pulled back slightly into the endoscope, and the entire gastroscope with forceps and grabbed string is removed slowly via the patient’s mouth. The string is pulled out of the patient’s mouth in order to attach the PEG tube.
The PEG tube is now attached to the string, and the assistant has to pull the string back through the abdominal wall for the tube to pass through mouth, oesophagus and into the stomach until the internal fixating plate is attached to the stomach wall (Fig. 70.6).
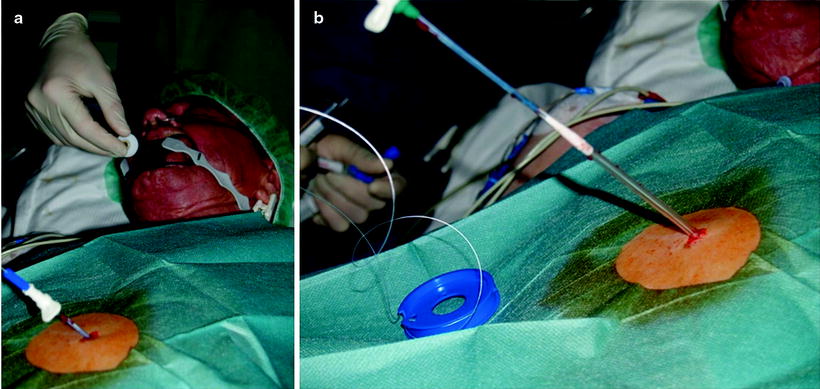

Fig. 70.6
The PEG tube is attached to the string and pulled through the patient’s mouth (a) and out of the abdominal wall (b)
The correct positioning of the internal plate is again confirmed via the gastroscope (Fig. 70.7). The top of the tube is cut off, and the external fixation plate and attachments are secured on the tube (Figs. 70.8 and 70.9)
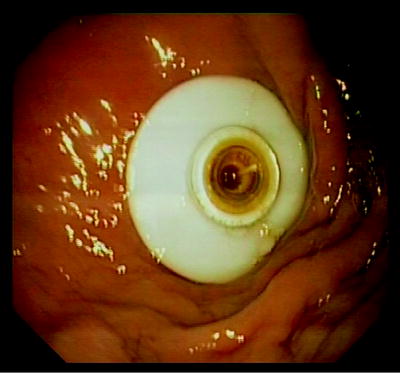
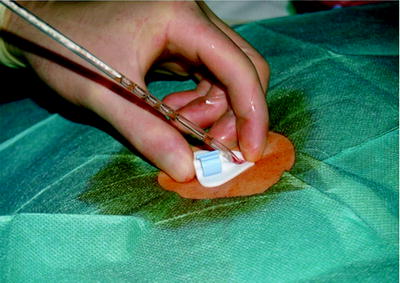


Fig. 70.7
Internal fixation plate visible endoscopically

Fig. 70.8
External fixation plate of the PEG tube
Stay updated, free articles. Join our Telegram channel

Full access? Get Clinical Tree


