Chapter 4 Radiation Safety
For consistency throughout this chapter, the patient is always positioned prone. Therefore, all C-arm positions (e.g., anteroposterior, lateral) are made with reference to a prone patient. Please see Chapter 3, Table 3–1 for definitions of the different C-arm movements and other conventions used throughout this atlas.
Note: Please see page ii for a list of anatomical terms/abbreviations used in this book.
Background
 X-radiation (x-ray) is a form of ionizing electromagnetic radiation, which has more energy than visible light and can penetrate solid objects.
 Unlike visible light, x-ray is undetectable by our five senses, which can create a false sense of safety.
 There is no lower limit to safe dose of radiation. Any dose of radiation can produce some degree of detrimental effect.
 The effects of x-ray exposure (even high levels of exposure) may not be noticeable until a later date.
 Radiation exposure can result in cataract formation, radiation burns, and other permanent changes at the cellular level (e.g., cancer).
 While performing fluoroscopic procedures the operator should continuously minimize radiation dosage by using all reasonable methods. This principle is referred to as “ALARA (As Low As Reasonably Achievable)” and is a regulatory requirement for all radiation safety programs.
Proper C-Arm Operation: Limiting Exposure Time
Anticipating the appropriate C-arm position before obtaining an image will limit unnecessary radiation exposure. For example, when setting up a particular trajectory or other view, one can expect that to obtain a “true” anteroposterior view of a segment, the C-arm will need to be tilted appropriately to match the lordosis or kyphosis of the segment of interest (see Figure 3–1). Likewise, the C-arm will need to be obliqued to the anticipated angle before any exposure occurs. Although in many chapters the need to both tilt and then oblique is emphasized, these motions can of course be combined to further minimize radiation time and exposure.
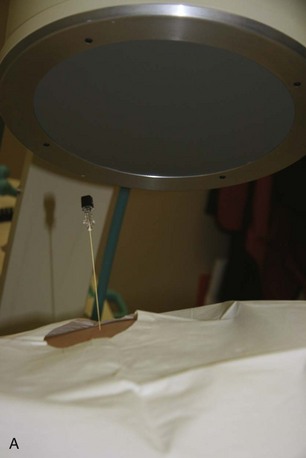
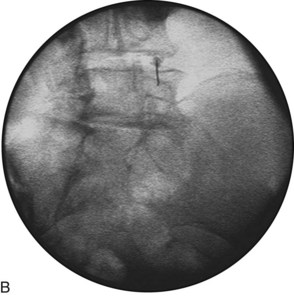
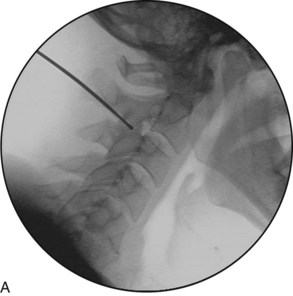
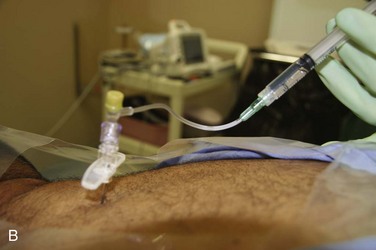
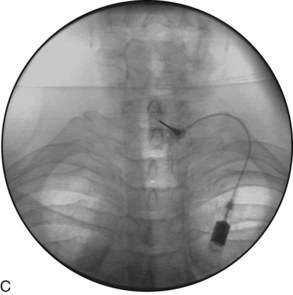
While advancing in the trajectory view, the needle should be parallel to the beam (and perpendicular to the flat surface of the image intensifier). If it is not, adjust the needle before obtaining an image (Figures 4-1 and 4-2).
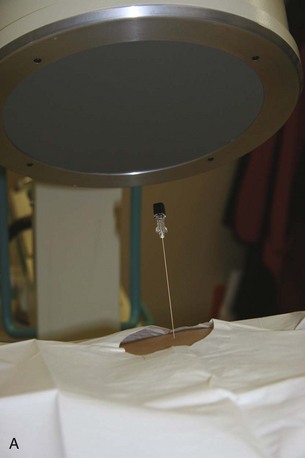
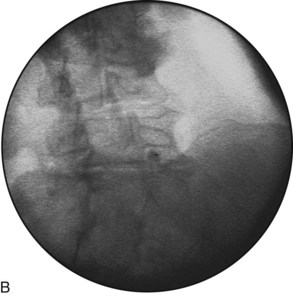
Figure 4–2 A, The needle has now been adjusted and appears to be inserted parallel to the beam. B, The fluoroscopic image confirms an exposure parallel to the needle, with the hub and needle in line (i.e., a “hubogram”; see Chapter 3).
Proper C-Arm Operation: Limiting Exposure Time Use Pulsed Mode Fluoroscopy
Use Low Dose Mode whenever possible. Many conventional fluoroscopes are capable of operation in various dose modes, commonly referred to as “Low Dose”, “Medium Dose” and “High Dose”. As the name implies, each mode allows a different amount of x-ray exposure per unit time, with Low Dose generating the least amount of x-rays per unit time. One study found approximately a 50% reduction in fluoro times when switching from automatic exposure settings to pulse and low dose mode.2 There is a trade-off though, in image quality. With experience, the interventionalist will discern when to utilize the various available modes on a given fluoroscope (e.g., continuous mode fluoroscopy provides increased temporal resolution and therefore may be more appropriate than pulsed mode for contrast visualization under “live” or “real-time” injection).
Use Last Image Hold, which automatically saves each image and displays it on a second monitor for comparison to the current image. Another technique, preferred by the authors, is to frequently save images for reference. By saving the last image prior to adjusting the C-arm for multiplanar imaging (e.g., transition from AP to lateral), the interventionalist will always have a reference image available. (See Chapter 3.)
When mid-thoracic, consider using a small gauge needle (e.g., 25 g) to “mark” a level to avoid needing to count again. See Chapter 22 (Thoracic Interlaminar ESI) for examples of marker use.
Proper C-Arm Operation: Maximizing Distance from Source
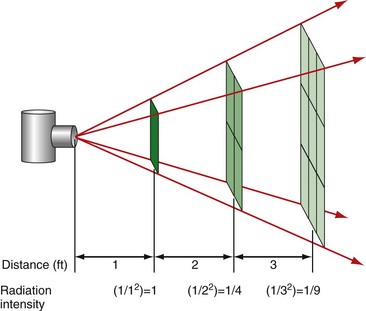
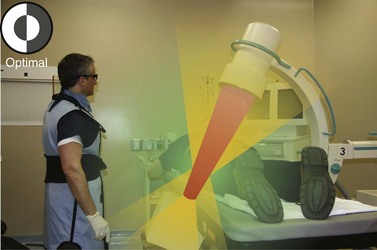
Maintaining optimal operator distance from the x-ray source throughout the procedure is an important way in which accumulated radiation exposure can be minimized. This is based on the inverse square law (Figures 4-3 through 4-10).
