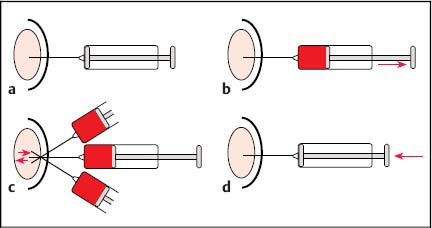
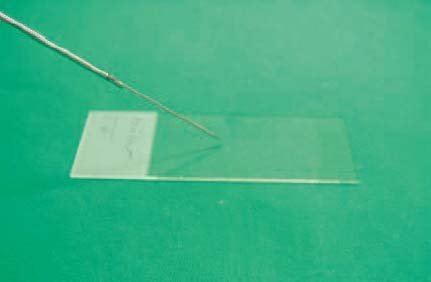
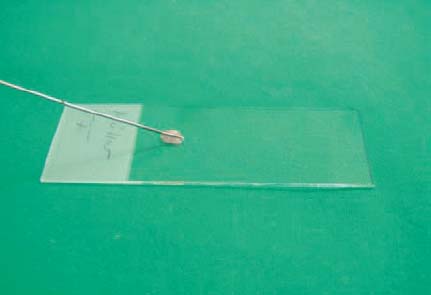
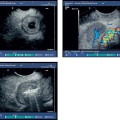
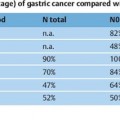
11 Tips and Tricks for Fine-Needle Puncture There is a very wide range of morphological equivalents for a pathological structure that is visualized on ultrasonography. Options include inflammatory conditions, benign or malignant tumors, and metastases. Cytological or histological confirmation of the diagnosis is often required in order to distinguish between the different possibilities. The hints and tips presented here are intended for cytological aspiration biopsy—better known as fine-needle aspiration biopsy (FNAB). The advantages of the current microinvasive technique include: • A high level of patient acceptance • The high diagnostic yield • A low risk of complications • Low cost These considerations have led to this valuable method being accepted throughout the world. Definition of Fine-Needle Puncture Various different terms are used for the fine-needle puncture technique (needle diameter < 1 mm) in everyday clinical practice: • Fine-needle aspiration (FNA) • Fine-needle aspiration biopsy (FNAB) • Fine-needle aspiration cytology (FNAC) • Fine-needle biopsy (FNB) • Fine-needle cytology (FNC) A variety of fine-needle systems are now commercially available, which can be used with endoscopic ultrasound (EUS) equipment for imaging-guided biopsy procedures. The main advantage of EUS-guided fine-needle puncture appears to be the ability to control the needle tip in real time during the puncture process. However, the results depend not only on the puncture process, but also on the processing of the resulting specimen and the quality of the cytologist. Unfortunately, there is as yet no standard procedure for specimen processing. There is no consensus on whether it is necessary to use a fixation process for the specimens, or if so, whether fixation should be performed before or after smearing onto the microscopic slide. Nor is it clear which fixation method is best. However, we would like to discuss and clarify the following questions here: • What fixation methods are available? • How should the specimens be stained? • Is it possible to create a standard for cytological diagnosis? Nine steps are involved in a normal cytological examination process, according to Lopes Cardozo:1 • Indication for fine-needle aspiration • Choice of the best way of obtaining the specimen • Process of taking the specimen • Preparation of the specimen • Fixation process • Staining process • Preliminary analysis of the material • Formulating a diagnosis on the basis of clinical information • Matching the diagnosis to the patient’s disease All of these diagnostic steps are equally important in order to obtain an optimal result. Normally, steps 1–5 and 9 are performed by the clinical practitioner, whereas steps 6–8 are carried out by the cytologist. In our opinion, steps 2,3, and 9 are the most difficult and require perfect teamwork between the clinical practitioner and the cytologist to ensure the best possible result. It is important to mention two different ways of obtaining a cytological diagnosis at this point. On the one hand, there are central cytology laboratories with no direct connection to the clinical practitioner (as in the case of one of the present authors, T.T.); on the other hand, cytologically trained clinical practitioners (as in the case of the other author, T.B.) may have a direct link to a clinical department (such as pulmonology). The goal in both cases is to match the cytological specimens to the correct diagnosis. The cytologically trained clinical practitioner carries out a simultaneous preliminary analysis during the puncture process, which is advantageous as it reduces the number of specimen collections. This results in better patient comfort and increases the sensitivity of the method. On the other hand, the cytology specialist naturally has a wider knowledge of different diseases and can use immunocytology to obtain a clearer diagnosis. It is important to obtain an optimal view of the lesion in question after an EUS examination of the patient. The most important consideration is to find the shortest possible route to the target, avoiding the surrounding blood vessels. One advantageous way of doing this is to use an assistant to control the needle movement into the lesion (in real-time puncture) while the examiner controls the echoendoscope to maintain optimal positioning. After the needle has entered the target, the stylet has to be removed. A syringe with a volume of 10 mL should then be attached at the end of the needle and used to produce suction (pressure below atmospheric level). While continuous suction through the syringe is being maintained, the needle should be passed through the lesion movement forward and backward in a fanlike pattern. After three to five needle passes, the suction should be released and the needle removed (Fig. 11.1). After the puncture process has been performed, the fine-needle aspiration system should immediately be removed from the echoendoscope, and a new 10 mL syringe filled with 10 mL air should be placed at the end of the needle system. The collected specimen has to be spread onto slides by carefully emptying the air-filled syringe through the needle. During this process, the tip of the needle has to be held directly on the slide to ensure that only small portions of the specimen are released. Alternatively, the stylet can be carefully reintroduced into the needle and the resulting pressure can be used to eject the specimen (Figs. 11.2 and 11.3). Immediately after this, the specimen should be smeared gently but quickly using another slide. The smaller the specimen drops, the thinner the specimen layer on the slide (Figs. 11.4 and 11.5). Too much pressure during the spreading process should be avoided, as it increases cell artifacts. Fig. 11.1a–d The fine-needle aspiration procedure. a Introducing the needle into the lesion. b Creating suction using a syringe. c The fanlike pattern of needle passes (three to five passes). d Releasing the suction and removing the needle. Fig. 11.2 Removal of the specimen from the needle (step 1). The Hancke-Vilmann fine-needle aspiration system is being used here. Fig. 11.3
![]()
Stay updated, free articles. Join our Telegram channel

Full access? Get Clinical Tree


