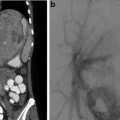
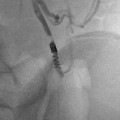
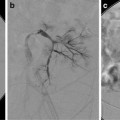
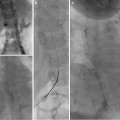
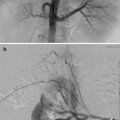
Fig. 22.1
Calyceal perforation and perirenal urinoma. (a) VCUG exam in newborn male with posterior urethral valves. (b) Vesicoureteral reflux through calyceal perforation into perirenal urinoma
Complications associated with urinoma include hydronephrosis from mass effect, paralytic ileus, electrolyte imbalance, and abscess formation. Urinoma with active urine leak can be diagnosed with contrast-enhanced CT with delayed images, retrograde pyelography, renal scintigraphy, or IVP.
Indications/Contraindications
The indications for drainage of urinoma are large-size or persistent leak over several days and fever or sepsis, regardless of size. Also, drainage of urinoma that separates renal fragments accelerates the healing process (Fig. 22.2).
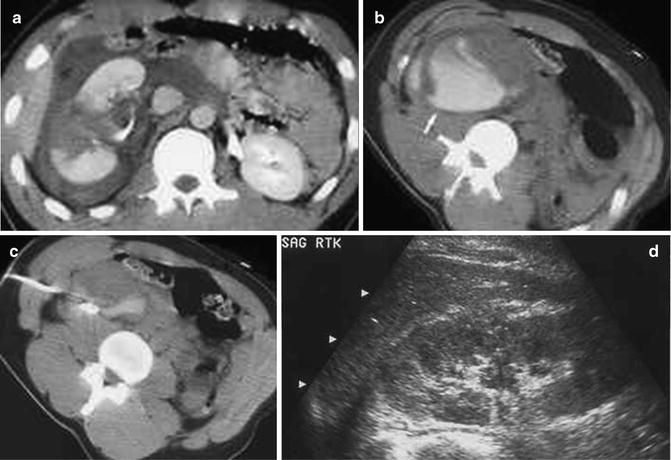

Fig. 22.2
Right renal fracture with perirenal urinoma. (a) Skydiver who after successful first jump was ceremoniously tossed into a pond onto a submerged rock, fracturing the right kidney. There is a sizable perinephric fluid collection around the fractured kidney. There is good enhancement of the renal fragments indicating vascular viability. (b) The delayed scans through the kidney show contrast collecting in the dependent portion of the perirenal space. Aspiration of the fluid yielded blood-tinged urine, indicating an active urine leak rather than active extravasation of blood. (c) A perirenal drainage catheter was placed and the urinoma was successfully drained. The catheter was left in place for about 10 days, over which time the catheter output gradually decreased. (d) A follow-up US at 1 month shows healing of the renal fracture with no re-accumulation of the urinoma
Urinoma drainage can be accomplished with ultrasound or CT guidance using standard percutaneous drainage techniques.
Percutaneous Nephrostomy
Indications
Percutaneous nephrostomy is a well-established interventional radiology procedure. The most common indications for percutaneous nephrostomy in the pediatric age group are UPJ obstruction, obstruction after pyeloplasty, UVJ obstruction, posterior urethral valves, treatment of complex urinary tract infection, and primary obstructive megaureter. Percutaneous nephrostomy may also be used as an initial step for the purpose of ureteral intervention, as discussed later in this chapter.
Anatomy
An understanding of renal anatomy is essential for avoiding potential complications. The main renal artery divides into the major anterior and posterior branches (Fig. 22.3) with the anterior branch supplying the anterior two-thirds and the posterior branch the posterior one-third of the kidney. Brodel’s bloodless line is a zone of relative avascularity posterior to the lateral convex border at the junction of the anterior two-thirds and posterior one-third of the kidney. The posterior calyces are oriented with their long axis towards this area. This ideal nephrostomy access route minimizes vascular injury by passing parallel to the renal vessels (Fig. 22.4).

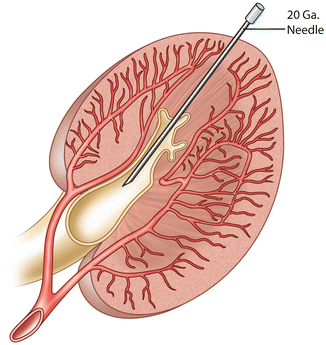

Fig. 22.3
Renal artery anatomy. (a) The main renal artery divides into anterior and posterior branches. (b) Brodel’s bloodless zone, relative avascularity at the junction of the anterior two-thirds and posterior one-third of the kidney

Fig. 22.4
The ideal nephrostomy access route minimizes vascular injury by passing parallel to the renal vessels
The puncture site is determined by the goal to be accomplished. A subcostal approach below the eleventh rib, into a lower pole calyx, is best for simple urinary drainage. A posterior calyx of the middle or upper collecting system is best accessed when there is expected ureteral intervention or subsequent endourologic procedures. In either instance, puncture of the renal infundibula or pelvis is avoided because there is a higher risk of vascular injury. All nephrostomy catheters should traverse the renal parenchyma before entering the collecting system. The parenchyma provides a secure seal and anchor around the catheter.
Conventional Technique
The patient is placed in a prone position on the fluoroscopy table. Aseptic technique including the use of hat, mask, and gown for the operators is performed. The patient’s skin is prepped and draped. Local anesthesia with 1 % buffered lidocaine is administered at the site of the needle entry. With ultrasound guidance, a 21-gauge micropuncture needle is used to access a posterior calyx in the middle or lower pole of the kidney (Fig. 22.5). Needle placement in the collecting system is confirmed by aspirating a small amount of urine, taking care not to totally decompress the system. A small amount of contrast can be gently injected to opacify the renal collecting system. A 0.018-inch stiff guidewire is advanced under fluoroscopic observation, and the needle is removed. A small slit in the skin is made large enough to accommodate the subsequent dilators and nephrostomy catheter. A percutaneous access set is advanced over the guidewire, and the stiffener and inner dilator are removed, leaving the 0.018-inch wire in place. It is important that the guidewire, dilator, and catheter introduction is done with the C-arm angled so the beam is approximately perpendicular to the skin entry. In this way, the needle, guidewire, dilators, and catheter are seen in profile so that guidewire kinking and perforation of the collecting system is avoided.
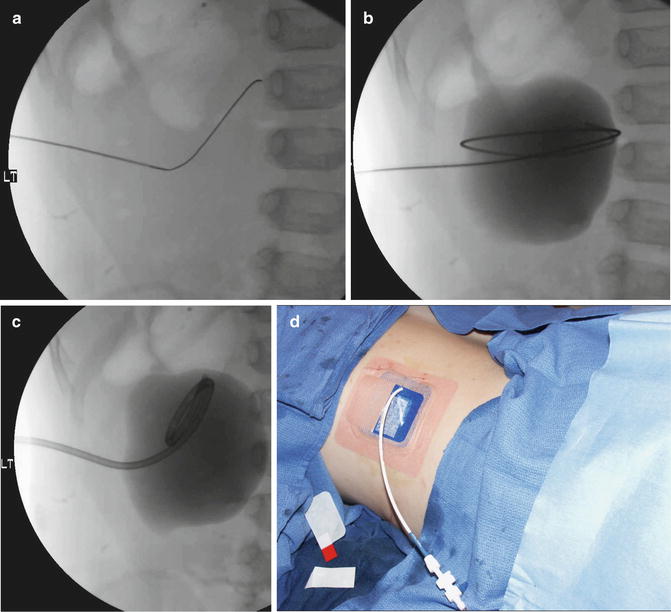

Fig. 22.5
Percutaneous nephrostomy placement using the conventional technique. (a) The dilated collecting system is entered with US guidance with a micropuncture needle, and a 0.018-inch Cope wire is advanced under fluoroscopic observation. (b) A small amount of contrast is injected to opacify the system. A 0.035-inch guidewire is coiled in the renal pelvis. (c) The pigtail of the nephrostomy catheter is formed in the dilated renal pelvis. (d) The catheter is secured with a Percu-Stay dressing and connected to gravity drainage
The procedure is continued by advancing a 0.035-inch stiff hydrophilic wire through the outer dilator and coiling the wire in the renal collecting system or preferably advancing down the ureter. The 0.018-inch wire can be secured and temporarily left in place as a safety wire. The tract is serially dilated over the larger wire, and an 8-French (or larger) nephrostomy catheter is advanced over the larger wire. The larger wire is then removed and the pigtail formed in the renal pelvis. Contrast injection confirms proper catheter position without over distending the system. The catheter is connected to a drainage bag and secured to the skin with a dressing such as a Percu-Stay. The safety wire can then be removed.
Modified Technique
Nephrostomy placement in neonates and young infants present unique technical challenges not encountered in older children. Renal size in a newborn or young infant is much smaller than that of an older child. Even though the collecting system may be relatively dilated, the absolute amount of urine is small, so coiling guidewires and forming a pigtail of the catheter are difficult (Fig. 22.6). The small volume also means the collecting system can decompress rapidly during the procedure. In addition, the thinner renal parenchyma and surrounding retroperitoneal fat offer less resistance and support. These factors may make it difficult to advance a micropuncture set into the collecting system; the micropuncture set indents the parenchyma but fails to traverse it. The guidewire may be in the collecting system (Fig. 22.6d); however, the dilators and nephrostomy catheter do not penetrate the cortex, resulting in extrarenal catheter placement.
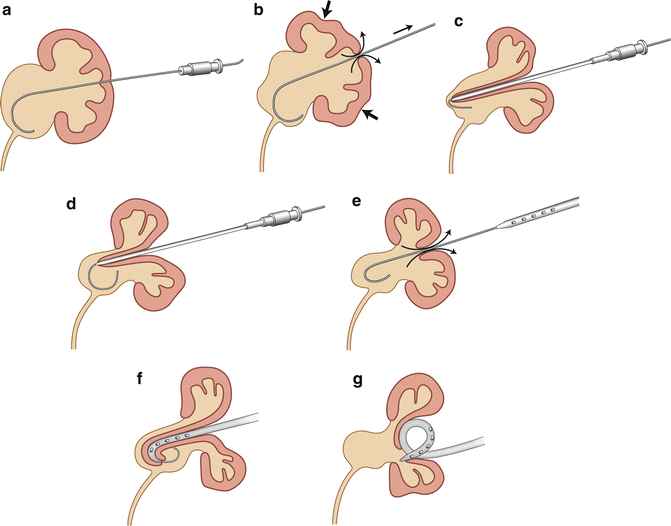

Fig. 22.6
Proposed mechanism for failed micropuncture technique in a neonatal kidney with UPJ obstruction. (a) The dilated collecting system is entered with a 21-gauge micropuncture needle. (b) As the 0.018-inch Cope wire is advanced through the needle, decompression of the collecting system begins. (c) An attempt is made to place a micropuncture set. The thin parenchyma offers little resistance. The small decompressing collecting system and the inability to negotiate the 0.018-inch Cope wire down the ureter, which is usually the case in severe UPJ obstruction, result in incomplete placement of the micropuncture set. (d) As the 0.035-inch wire is advanced through the outer sheath of the micropuncture set, the wire may or may not enter collecting system. The figure shows the floppy end of the wire in the collecting system. (e) The collecting system continues to decompress during each step. An attempt is made to place a nephrostomy tube over the 0.035-inch wire. (f) The catheter cannot be advanced into the collecting system because the wire cannot be manipulated down the ureter. The collecting system is nearly completely decompressed. On fluoroscopy, it is difficult to know whether the catheter is in the collecting system. (g) The wire is removed, leaving the nephrostomy catheter outside the decompressed collecting system. There is usually a urinoma around the kidney at this stage
Stay updated, free articles. Join our Telegram channel

Full access? Get Clinical Tree


